P11-2020 Smart brewery
Čítať ďalej: P11-2020 Smart brewery
- Návštevy: 675
Čítať ďalej: P11-2020 Smart brewery
Links:
link EA - link on EA repository
linkEA EN version - link on EA repository EN
good tutorial for ActivePresenter for beginners -
EA tutorials for beginners using ActivePresenter
Bc. Kamil Macek (S12) , Bc. Jozef Olejník (S16)
SMVIT, Winter term 2020/2021, FIIT STU
Project description
Create a series of short videos (tutorials) on your chosen topics related to working with EA using ActivePresenter tool. Make sure the videos are easy to explain (this will ensure that the videos are easy to understand even for complete beginners).
Motivation
Getting started with EA can be difficult, as it is complex software with many difficult-to-understand features. Therefore, we decided to create an educational tool aimed at understanding working with EA on the subject of SMIT represented by a series of videos in the ActivePresenter tool, which can simplify this initial work with EA and we can avoid discouraging the use of this tool.
We also belong to the category of people who feel stress when working with EA, and by creating this project we have the opportunity to learn to work with EA better, we would also like to get more similar and try working with ActivePresenter tool.
![]()
Goal
The goal of the project is to create a series of 8 videos dealing with basic UC executable in EA during the initial work with this tool.
In terms of complexity, these videos will be about the basic functionalities presented in the form of educational videos, as we ourselves are beginners in this area.
Analysis
It will be using as an introduction to the EA tool, the creation of diagrams and the possibilities of EA communication.
What do we need for the implementation of the project:
1) EA tool
2) ActivePresenter tool
3) List of topics of individual tutorials
Characteristics of videos:
video range will be shorter (range 2-10min)
simple
concise
dealing with some problem with working in EA
each video consists of an introductory page that describes what the video will be about and then continues the illustrative solution of the problem
information windows (type click here, write it ..) are also uniform, thanks to the ActivePresenter tool.
Project solution procedure:
1. installation of ActivePresenter and Enterprise Architect tools
2. Familiarize yourself with ActivePresenter
3. Define video themes
4. independent work with EA within the topics, understanding of the problem and its solutions
5. recording individual videos
6. making videos available to public
List of videos
1) Tutorial 1 - How to setup connection to model and create shortcut
available also as video - Tutorial 1 - video
2) Tutorial 2 - How to setup universal workspace
available also as video - Tutorial 2 - video
3) Tutorial 3 - How to communicate in Enterprise Architect
4) Tutorial 4 - How to create new project and generate class diagram from source code
6) Tutorial 6 - Generate documentation (pdf)
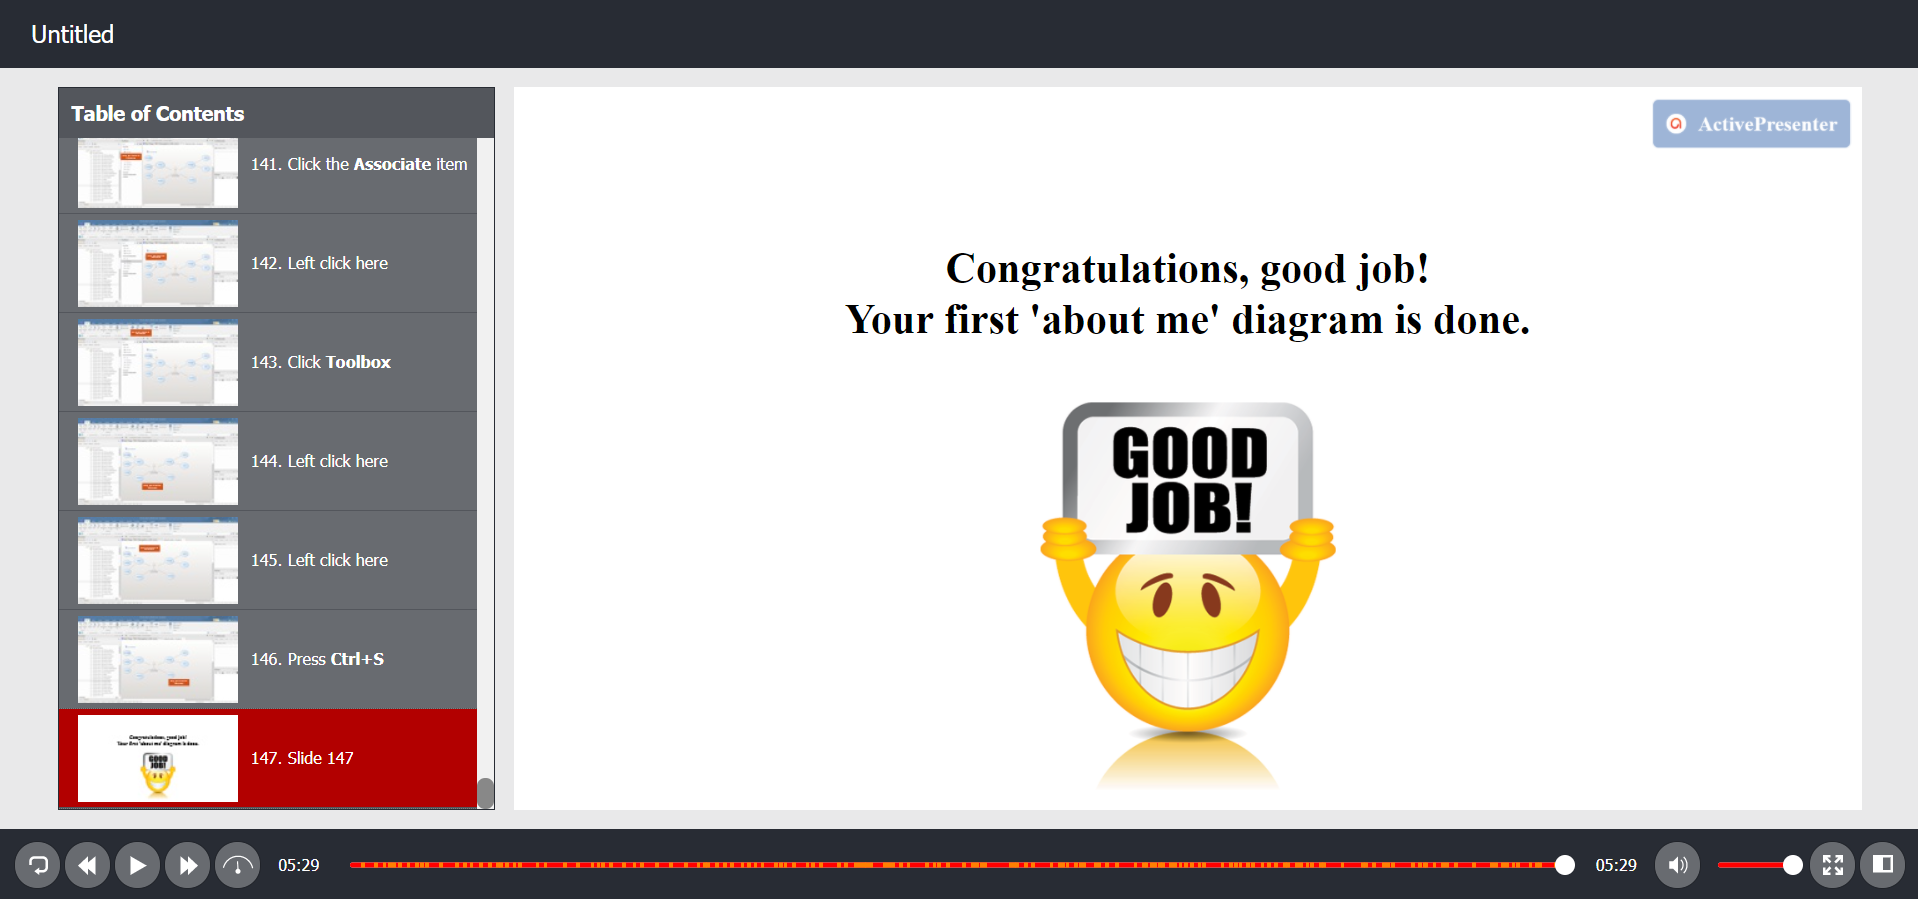
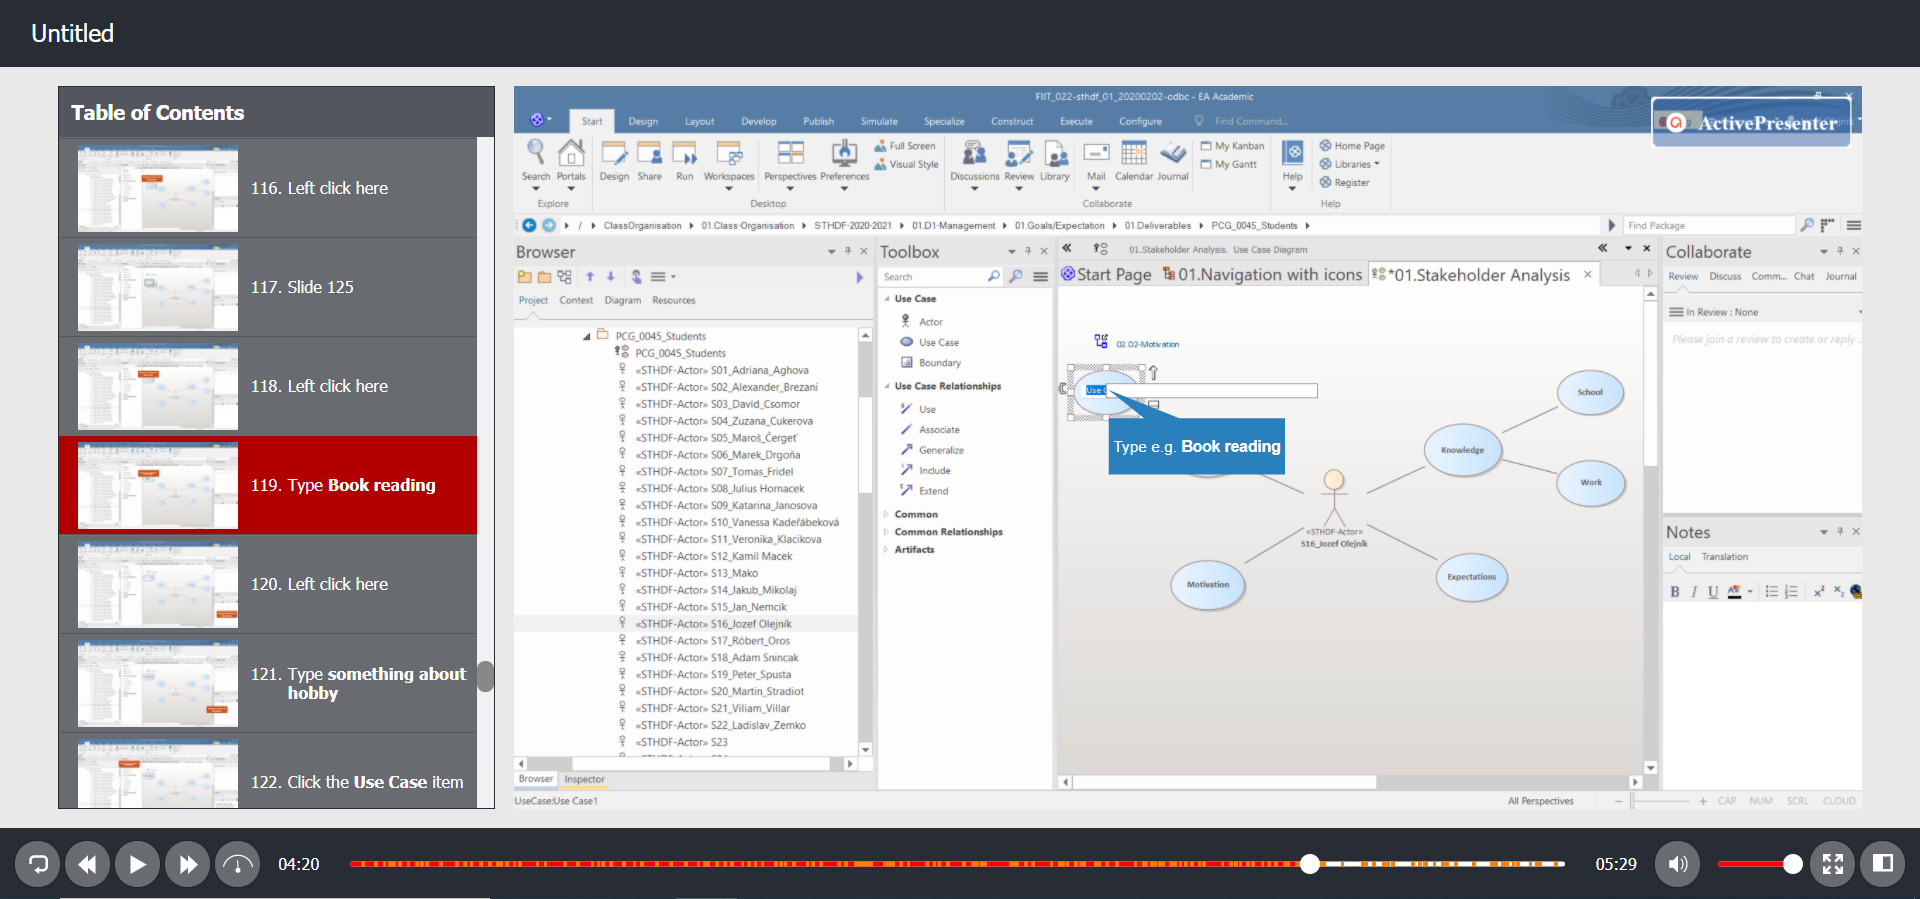
7) Tutorial 7 - Where to find your actor & creating simple 'about me' diagram
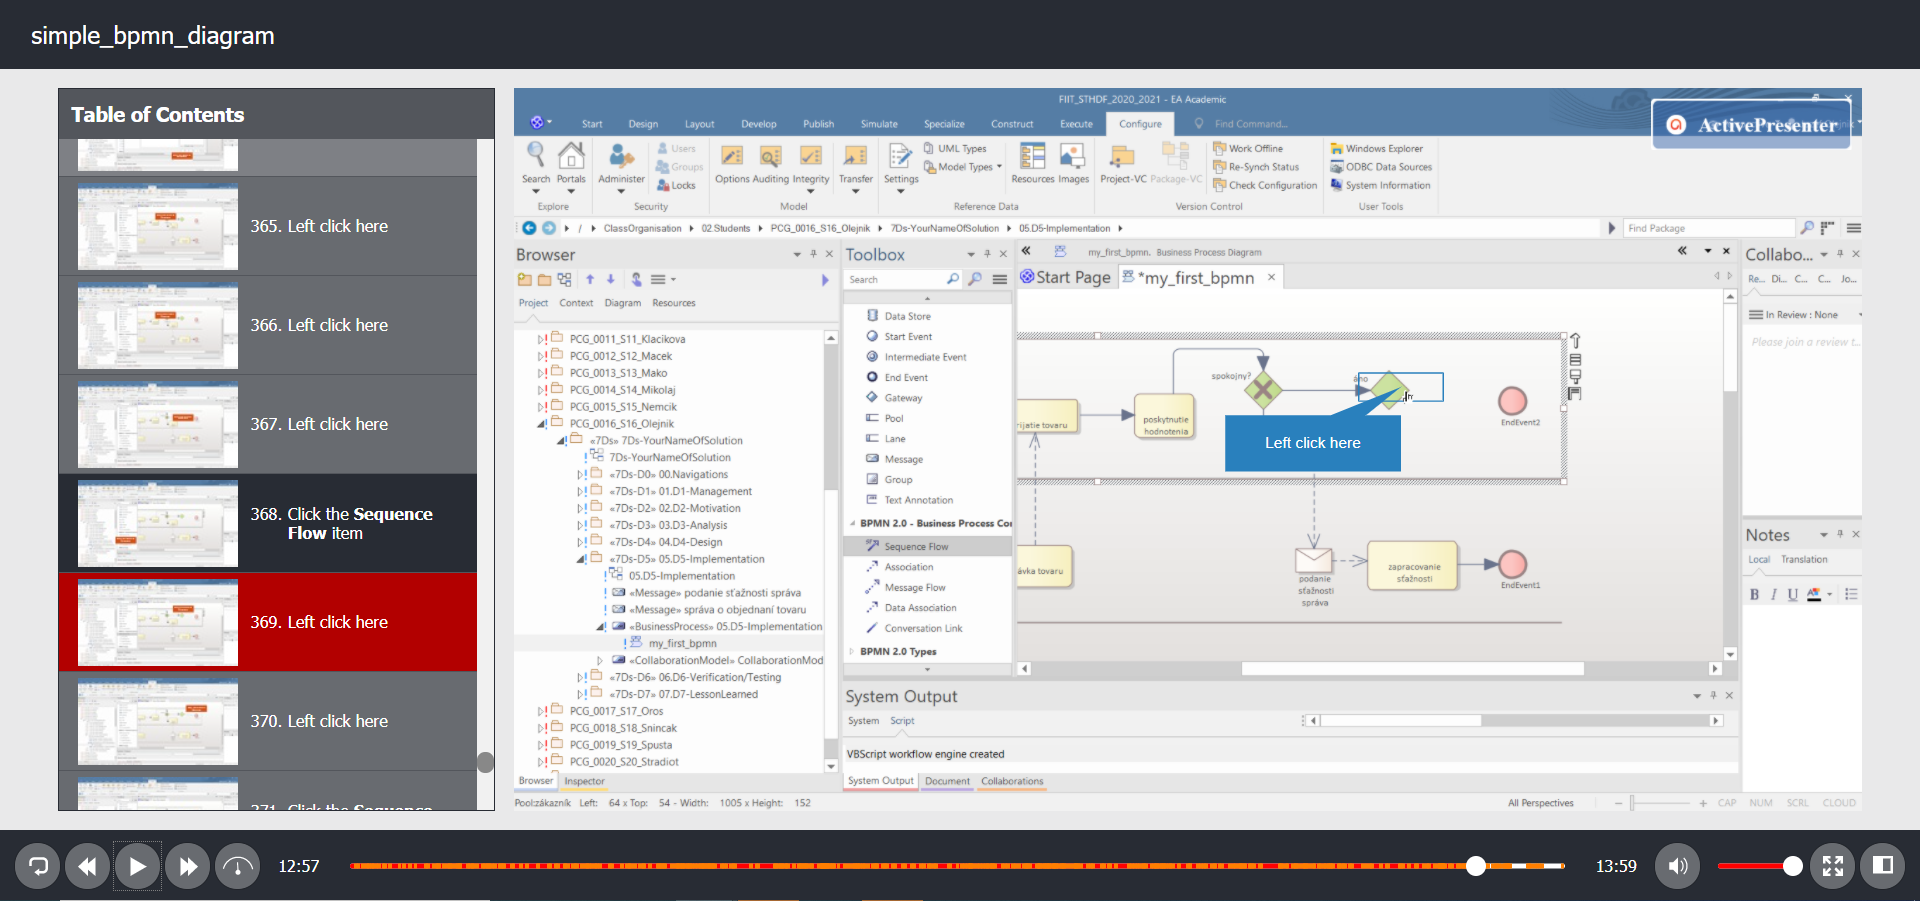
8) Tutorial 8 - How to create simple BPMN diagram
Fotodocumentation
Evaluation
We evaluate this project very positively, as we also had the opportunity to immerse ourselves more in working with EA and try the ActivePresenter, which is very useful tool. We had the opportunity to learn how to work with an active presenter tool, and finally we have a little more motivation to work in EA tool.
Some videos are similar to yours, and we motivated ourselves to try using the active presenter on those similar videos. Later on, we did our tutorial.
We think it's quite useful. Since the situation in the world is as it is, we are glad that we did not go with a hardware project, because it would be quite difficult to harmonize and create something functional and useful. We firmly believe that after the end of the COVID19 pandemic, we will have the opportunity to try out the technologies in FABLAB.
Lessons learned
At the beginning, we had weak experience working at EA, but we can say that by creating these videos, we are more motivated and inspired to work with EA now.
We also focused on modeling, not only on setup and work within the subject, as we are also interested in creating diagrams, and for example, EA is often used in the real jobs, so we can use EA tool in the future.
For the first time we tried to create a bpmn diagram and we liked how EA supports all the notations / diagrams, etc. We had the opportunity to see that EA keeps all changes, so we can go back to the changes we made. We also liked how to easily generate a class diagram from the code! :-)
We will definitely use the experience we gained in the future, whether at work or school, for example we can work with EA during the working on our diploma thesis, where we will definitely need to model the software in the analysis or design of the solution. We had the opportunity to see and try modeling with EA tool, it's really not so bad to use EA and it will only bring to you benefits in the future.
Next steps
Smart indoor glasshouse
Team Members: Jakub Mikolaj, Róbert Oros.
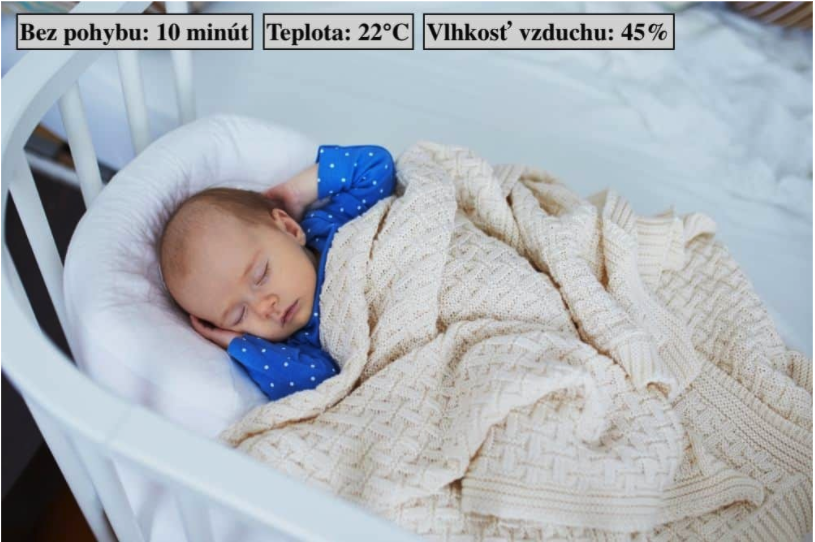
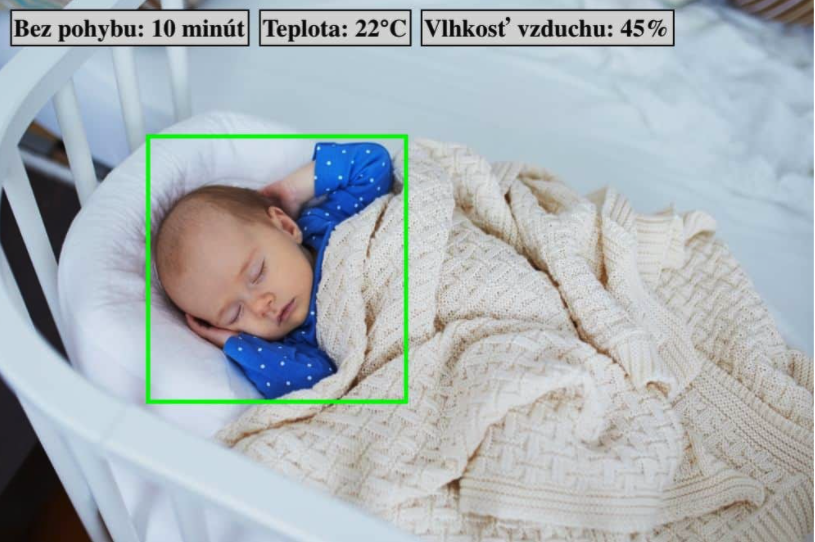
We came up with this idea because little babies were born in our families (and we believe that they will be born in the future) and we also think that this project would be suitable for our grandparents, when their monitoring is necessary in some health cases.
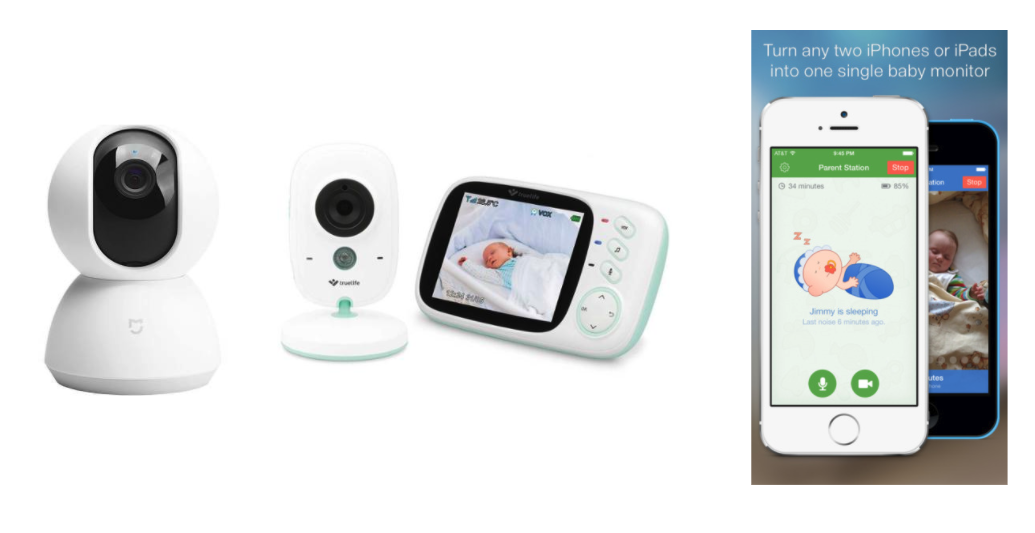
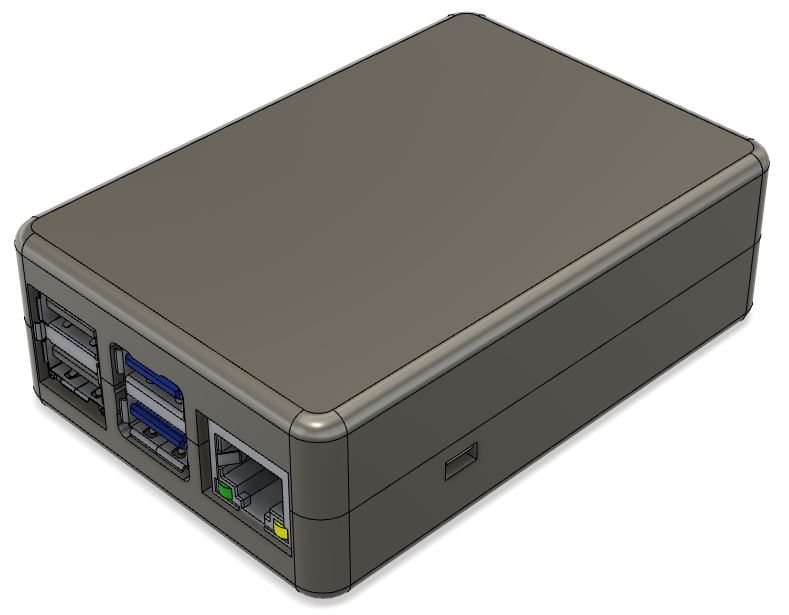
The most important component of baby monitor is control unit which will by drive all other elements. The control unit should be sufficiently powerful and compatible but at the same time small enough. Raspberry Pi best meets these requirements. The primary goal is to create a program that will provide an interface in which the user will be able to view records from the camera and hear sound. He will also be able to talk to the child Gradually, we will expand these basic functions with smart options such as motion and temperature measuring. The user will be notified of unwanted or unusual activities.
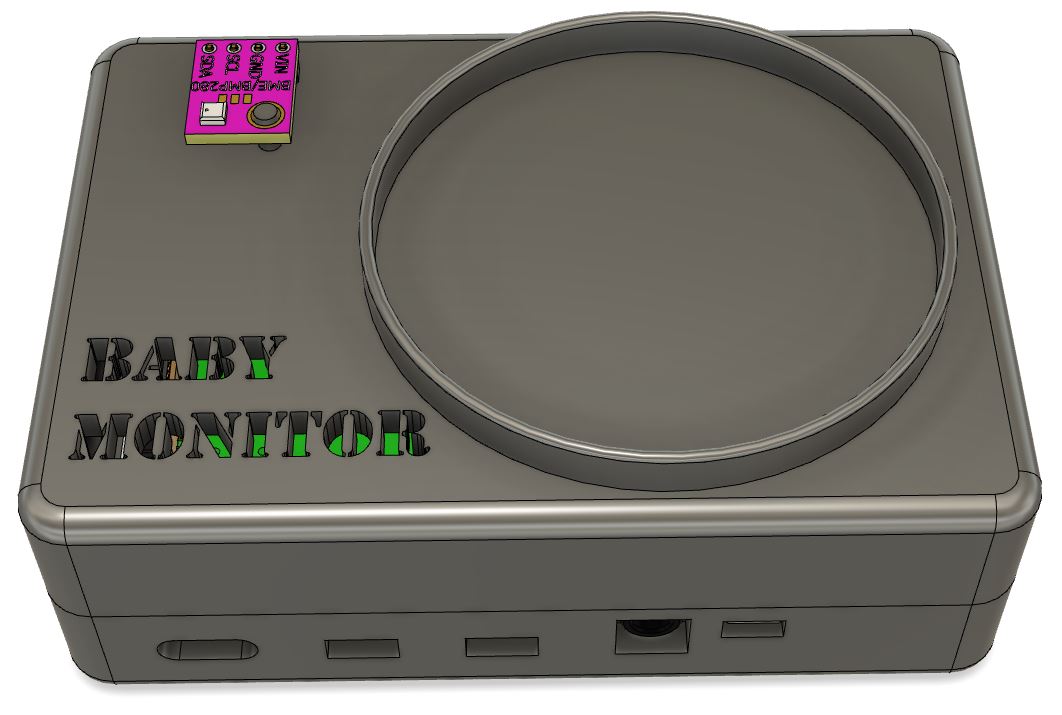
A camera (that will capture the baby) can be positioned in two ways as needed. Directly on the cover of the device or mount on the bed.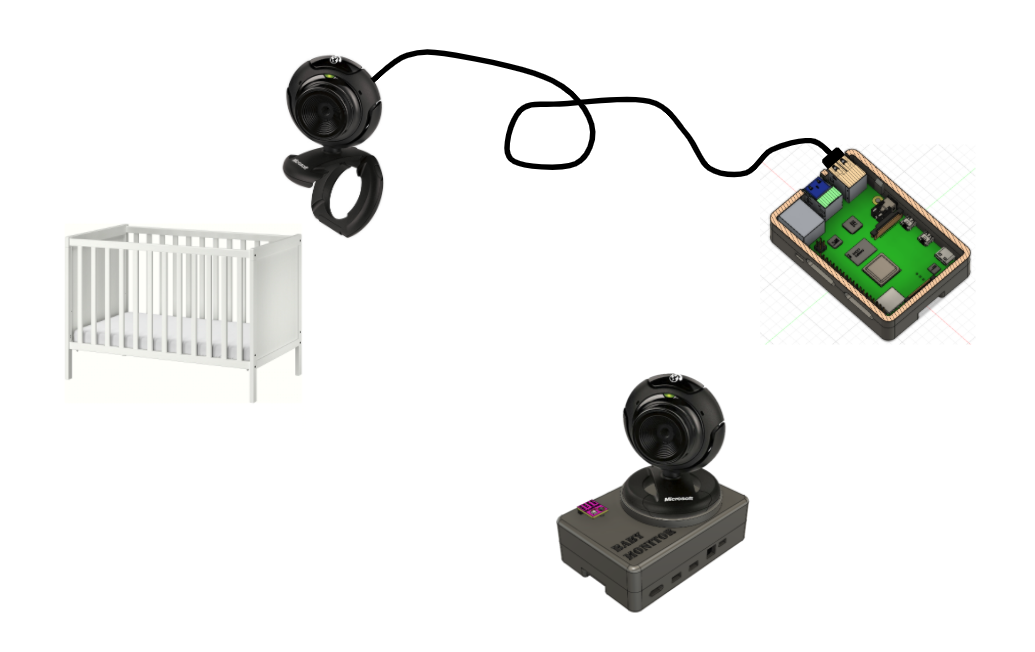
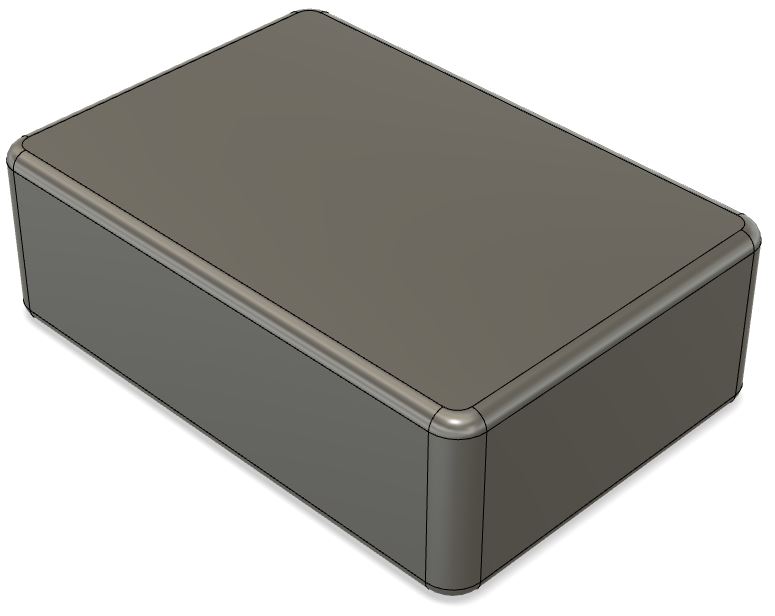
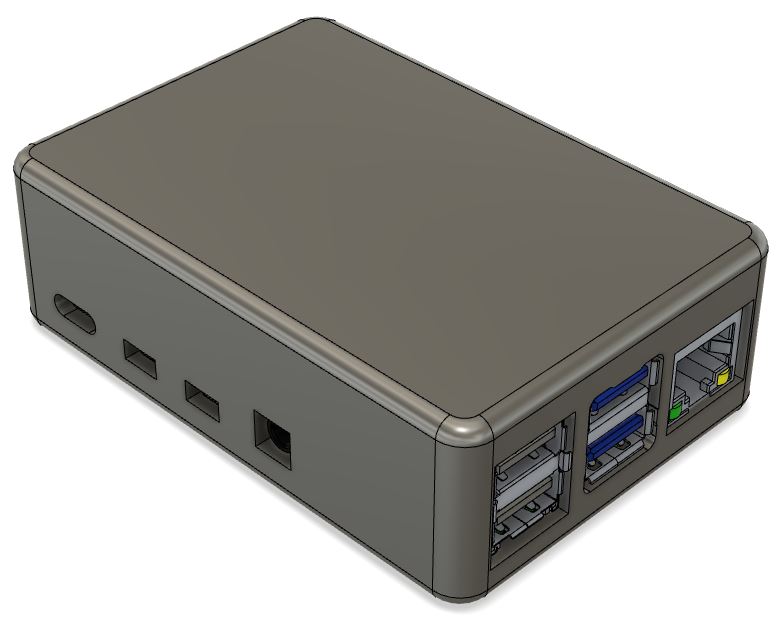
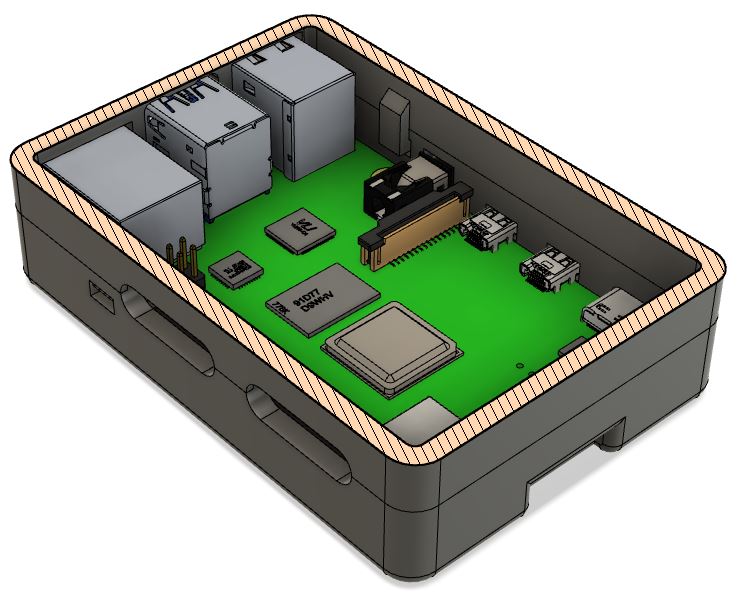
We need to cut holes for all inputs to Raspberry Pi (USB-C, USB, HDMI, micro HDMI, SD card...). At the bottom we created four pins for ensuring Raspberry Pi 4 against movement.
We split the case in half, to bottom and top part and also we created snap joints to hold the top and bottom parts together.
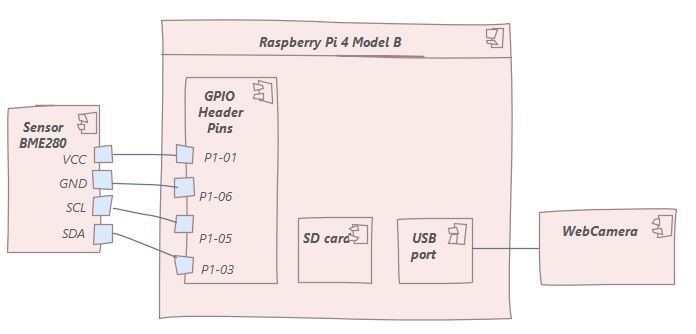
We realized that we also need holes for connecting the sensor (its cables) to GPIO pins header and also that I need to somehow connect the sensor to the raspberry pi. We did not want to put it inside the package so that the temperature was measured correctly.
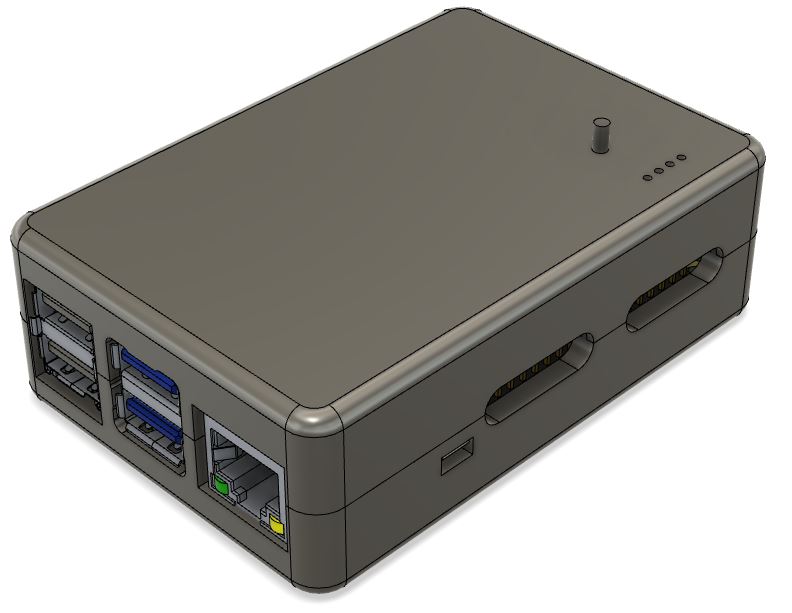
Since raspberri pi can overheat, we have created the inscription "Baby Monitor", which can also be used to ventilate hot air. Lastly we created a camera holder (only for our camera type – Microsoft lifecam vx 1000 what we found at home).
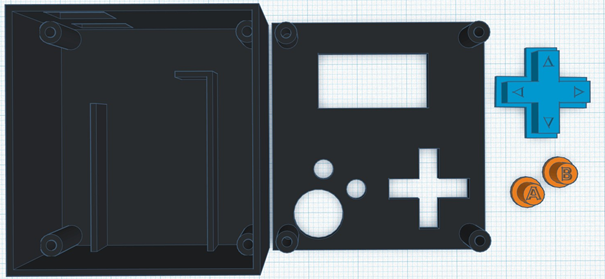
Our goal was to create smallest posible game console for gamers who want to play their favorite retro games whenever they want. In this project we created PCB design and scheme and and 3d model for Arduino micro based game console. At creating we aimed for small dimensions and good usability.
We aimed for users of all ages who want to play their favorite retro games.

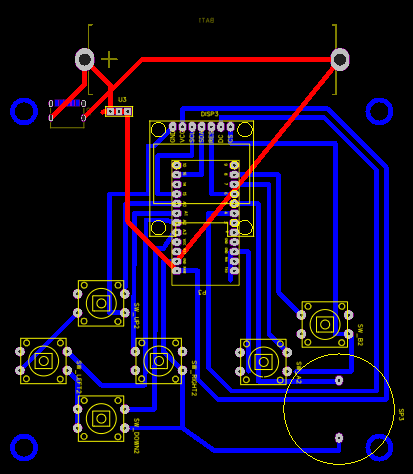
The red lines show the wires connected to the printed circuit board (dps).
The battery is not part of the board and is connected by wires to the board.
The loudspeaker in the lower right corner is actually smaller than designed and therefore does not overlap with the button or the anchor hole.
The display is actually larger than designed and is located at the level of the board and is connected to it by wires.
The dimensions of the board are 38x43x2 mm.
• 6 pcs button on the board
• 1 three-position switch
• 1 speaker for a flat board with a cross-section of 10 mm
• 1pc 0.96 “7 PIN SPI display
• 1pc USB C female
• 1pc battery 3-5V with dimensions up to 32x21x5mm
• 1pc Pro Micro Microcontroller
• 4pcs Screw with dimensions 2x15
1. Printing printable parts according to the enclosed models.
2. Production or ordering of the board according to the attached design.
3. Soldering the components in their place on the PCB according to the design.
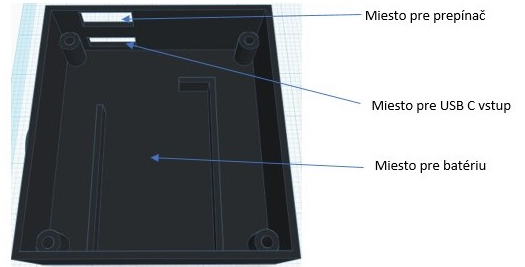
4. Glue the battery, switch and USB C input in place in the box
5. Insert the buttons at the top of the box
6. Insert the board into the box
7. Close the box
8. Screw on the box
Insert games into the console
• Open Arduino IDE> File> Preferences
• Enter the URL in the Additional Boards Manager URL and press OK.
o URL: https://github.com/MrBlinky/Arduboy-homemade-package
• Go to Tools> Boards> Boards Manager.
• Write homemade or Arduboy homemade in the text box.
• Select Arduboy Homemade package and press Install.
After installing the libraries go to the Tools menu and select the following:
• Board: Homemade Arduboy
• Bootloader: Cathy3K
• Based on: SparkFun Pro Micro 5V - Alternate Wiring
• Core: Arduboy optimized core
• Display: SSD1306
Games can be downloaded from: https://community.arduboy.com/c/games/35.
Open the .ino file and press upload.
Dungeon crawler
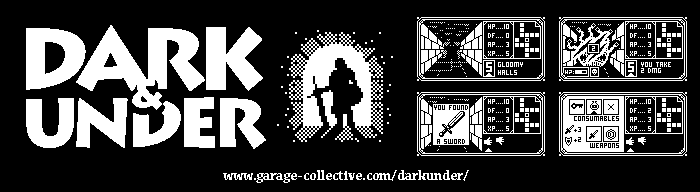
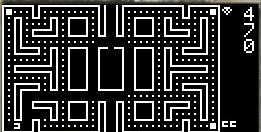
packman like


PROJECT IS COMPLETED - Last update: 13-JAN-2021
Hi, my name is David Csomor (s03) and my corresponding email is (
In my knowledge base, I try to very briefly describe a process of rooting an Android phone, what it is, what are advantages/disadvantages and how to do it on a Samsung Galaxy Note 9.
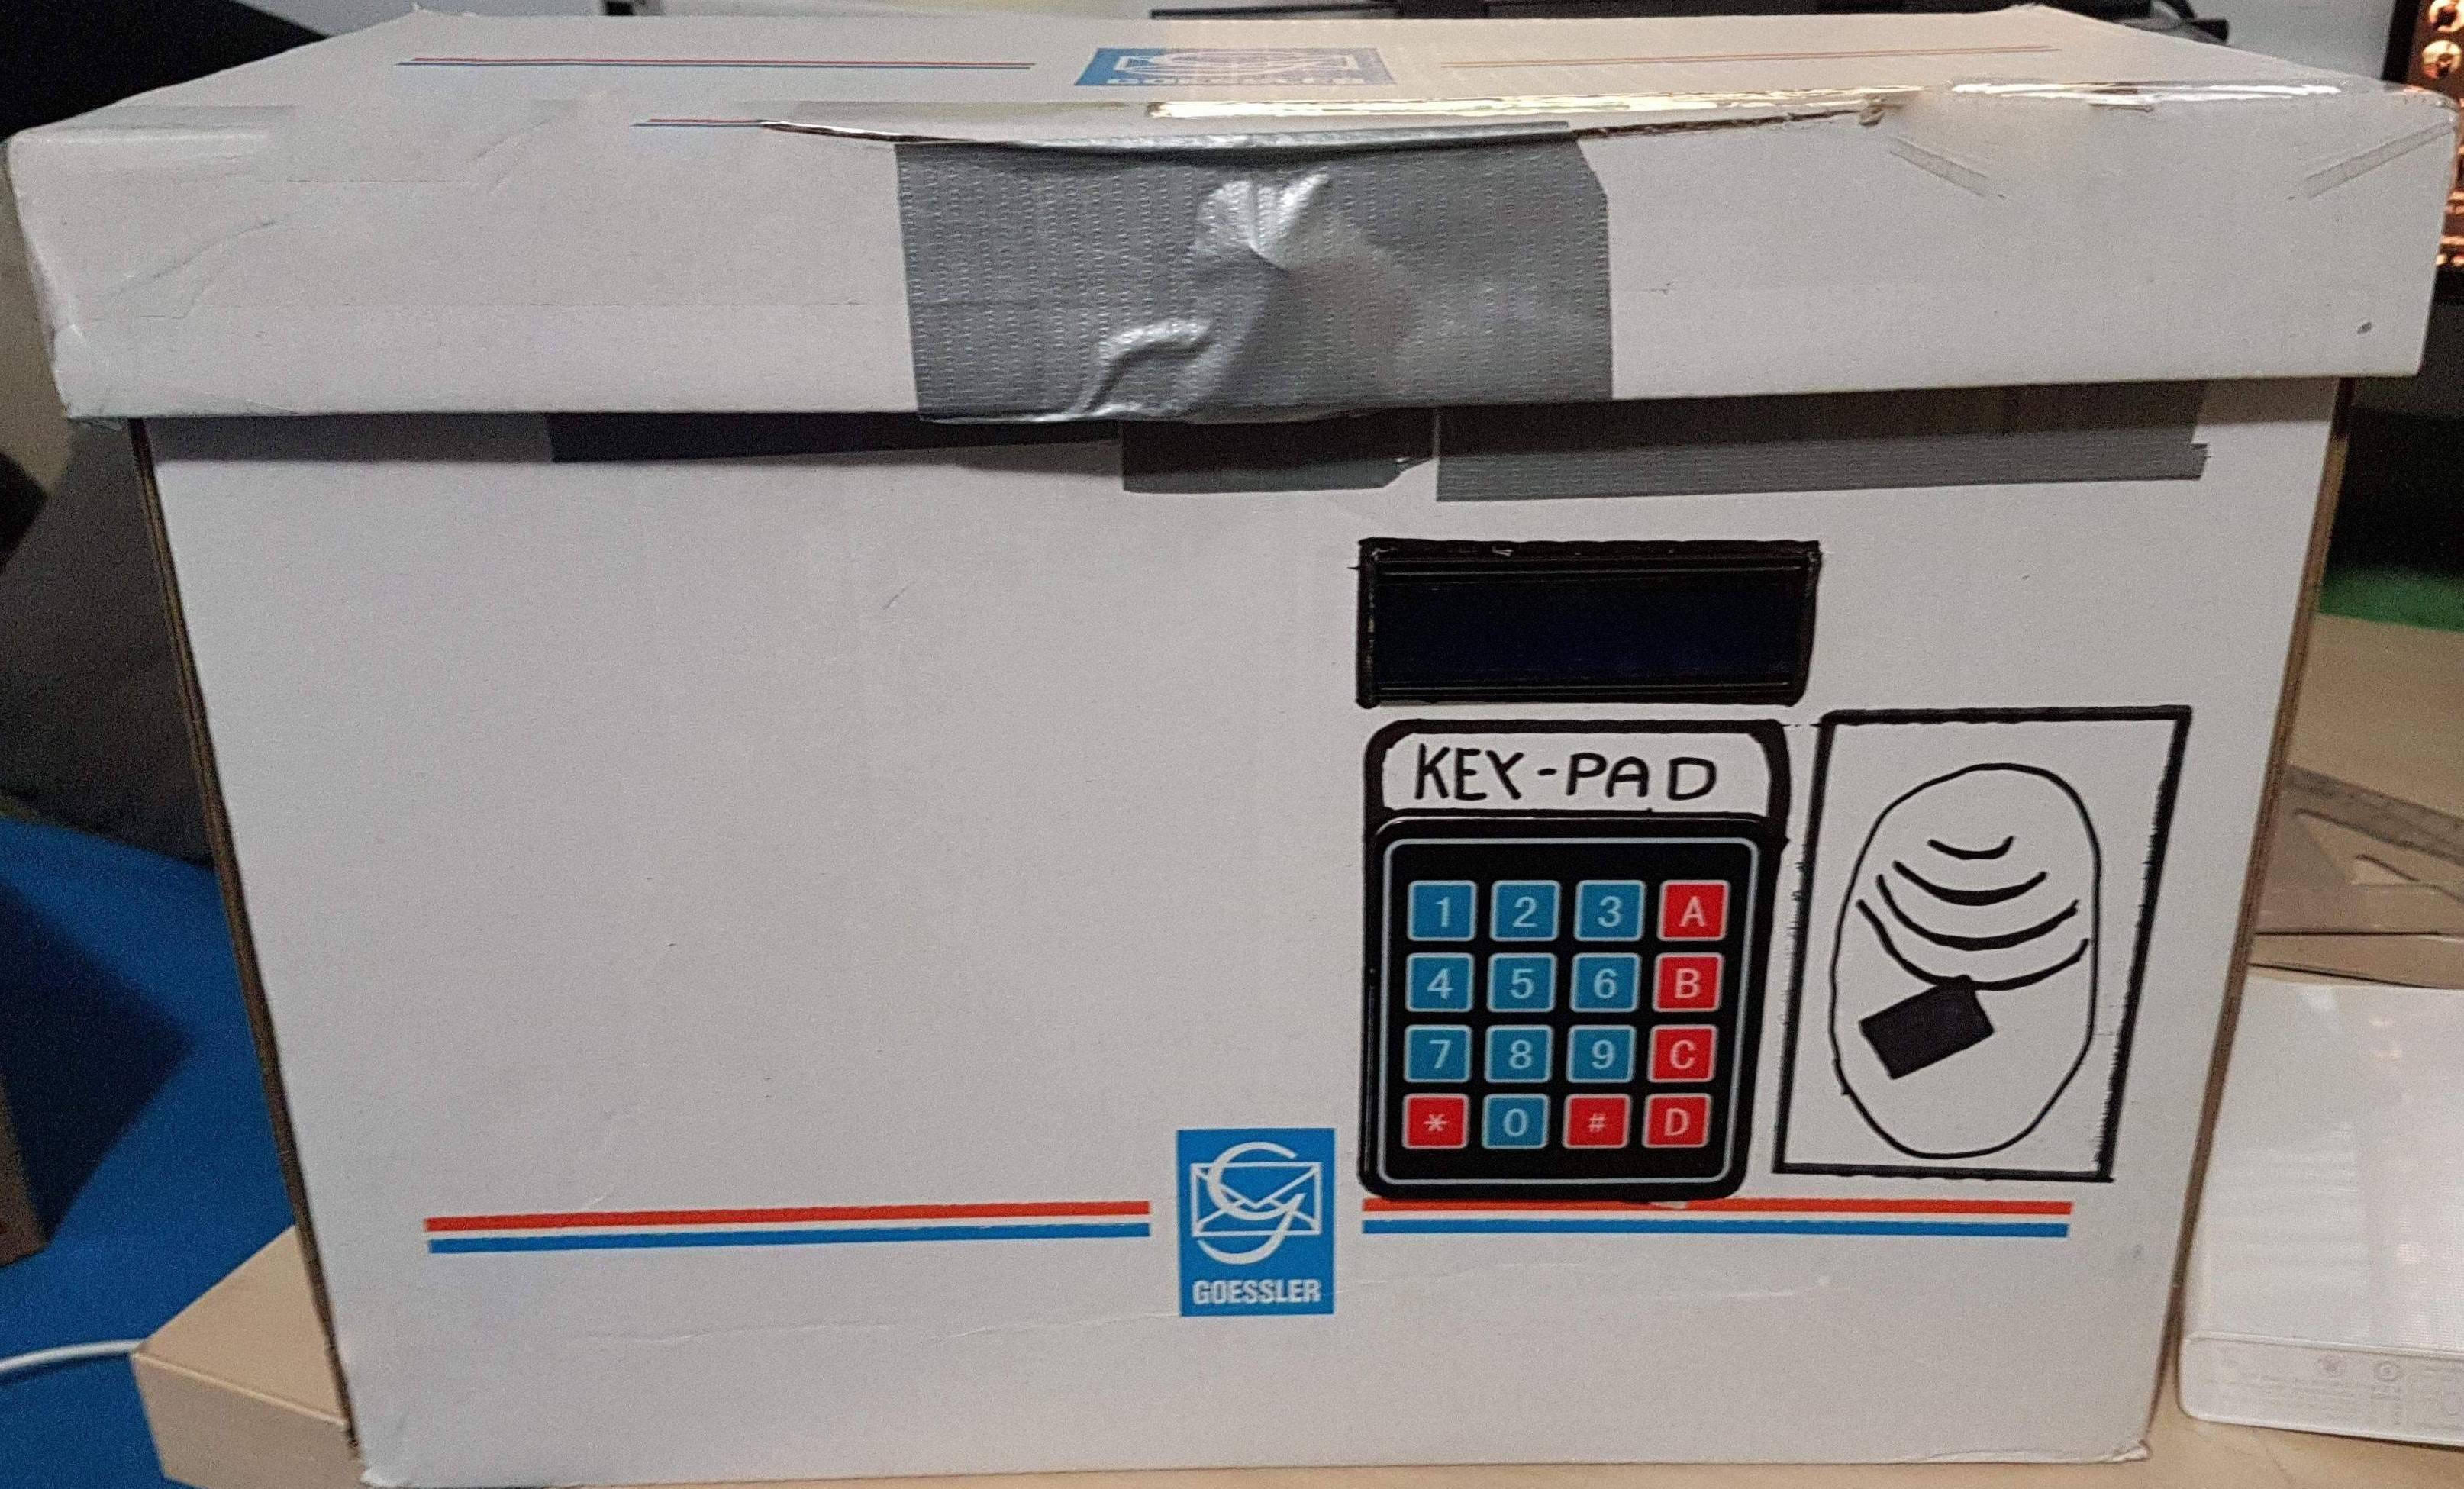
In my project, I am making an access control system (demonstrated on a safe/strongbox prototype), which can be locked/unlocked through RFID card or PIN code. The safe is able to provide auditory and visual cues about its state.
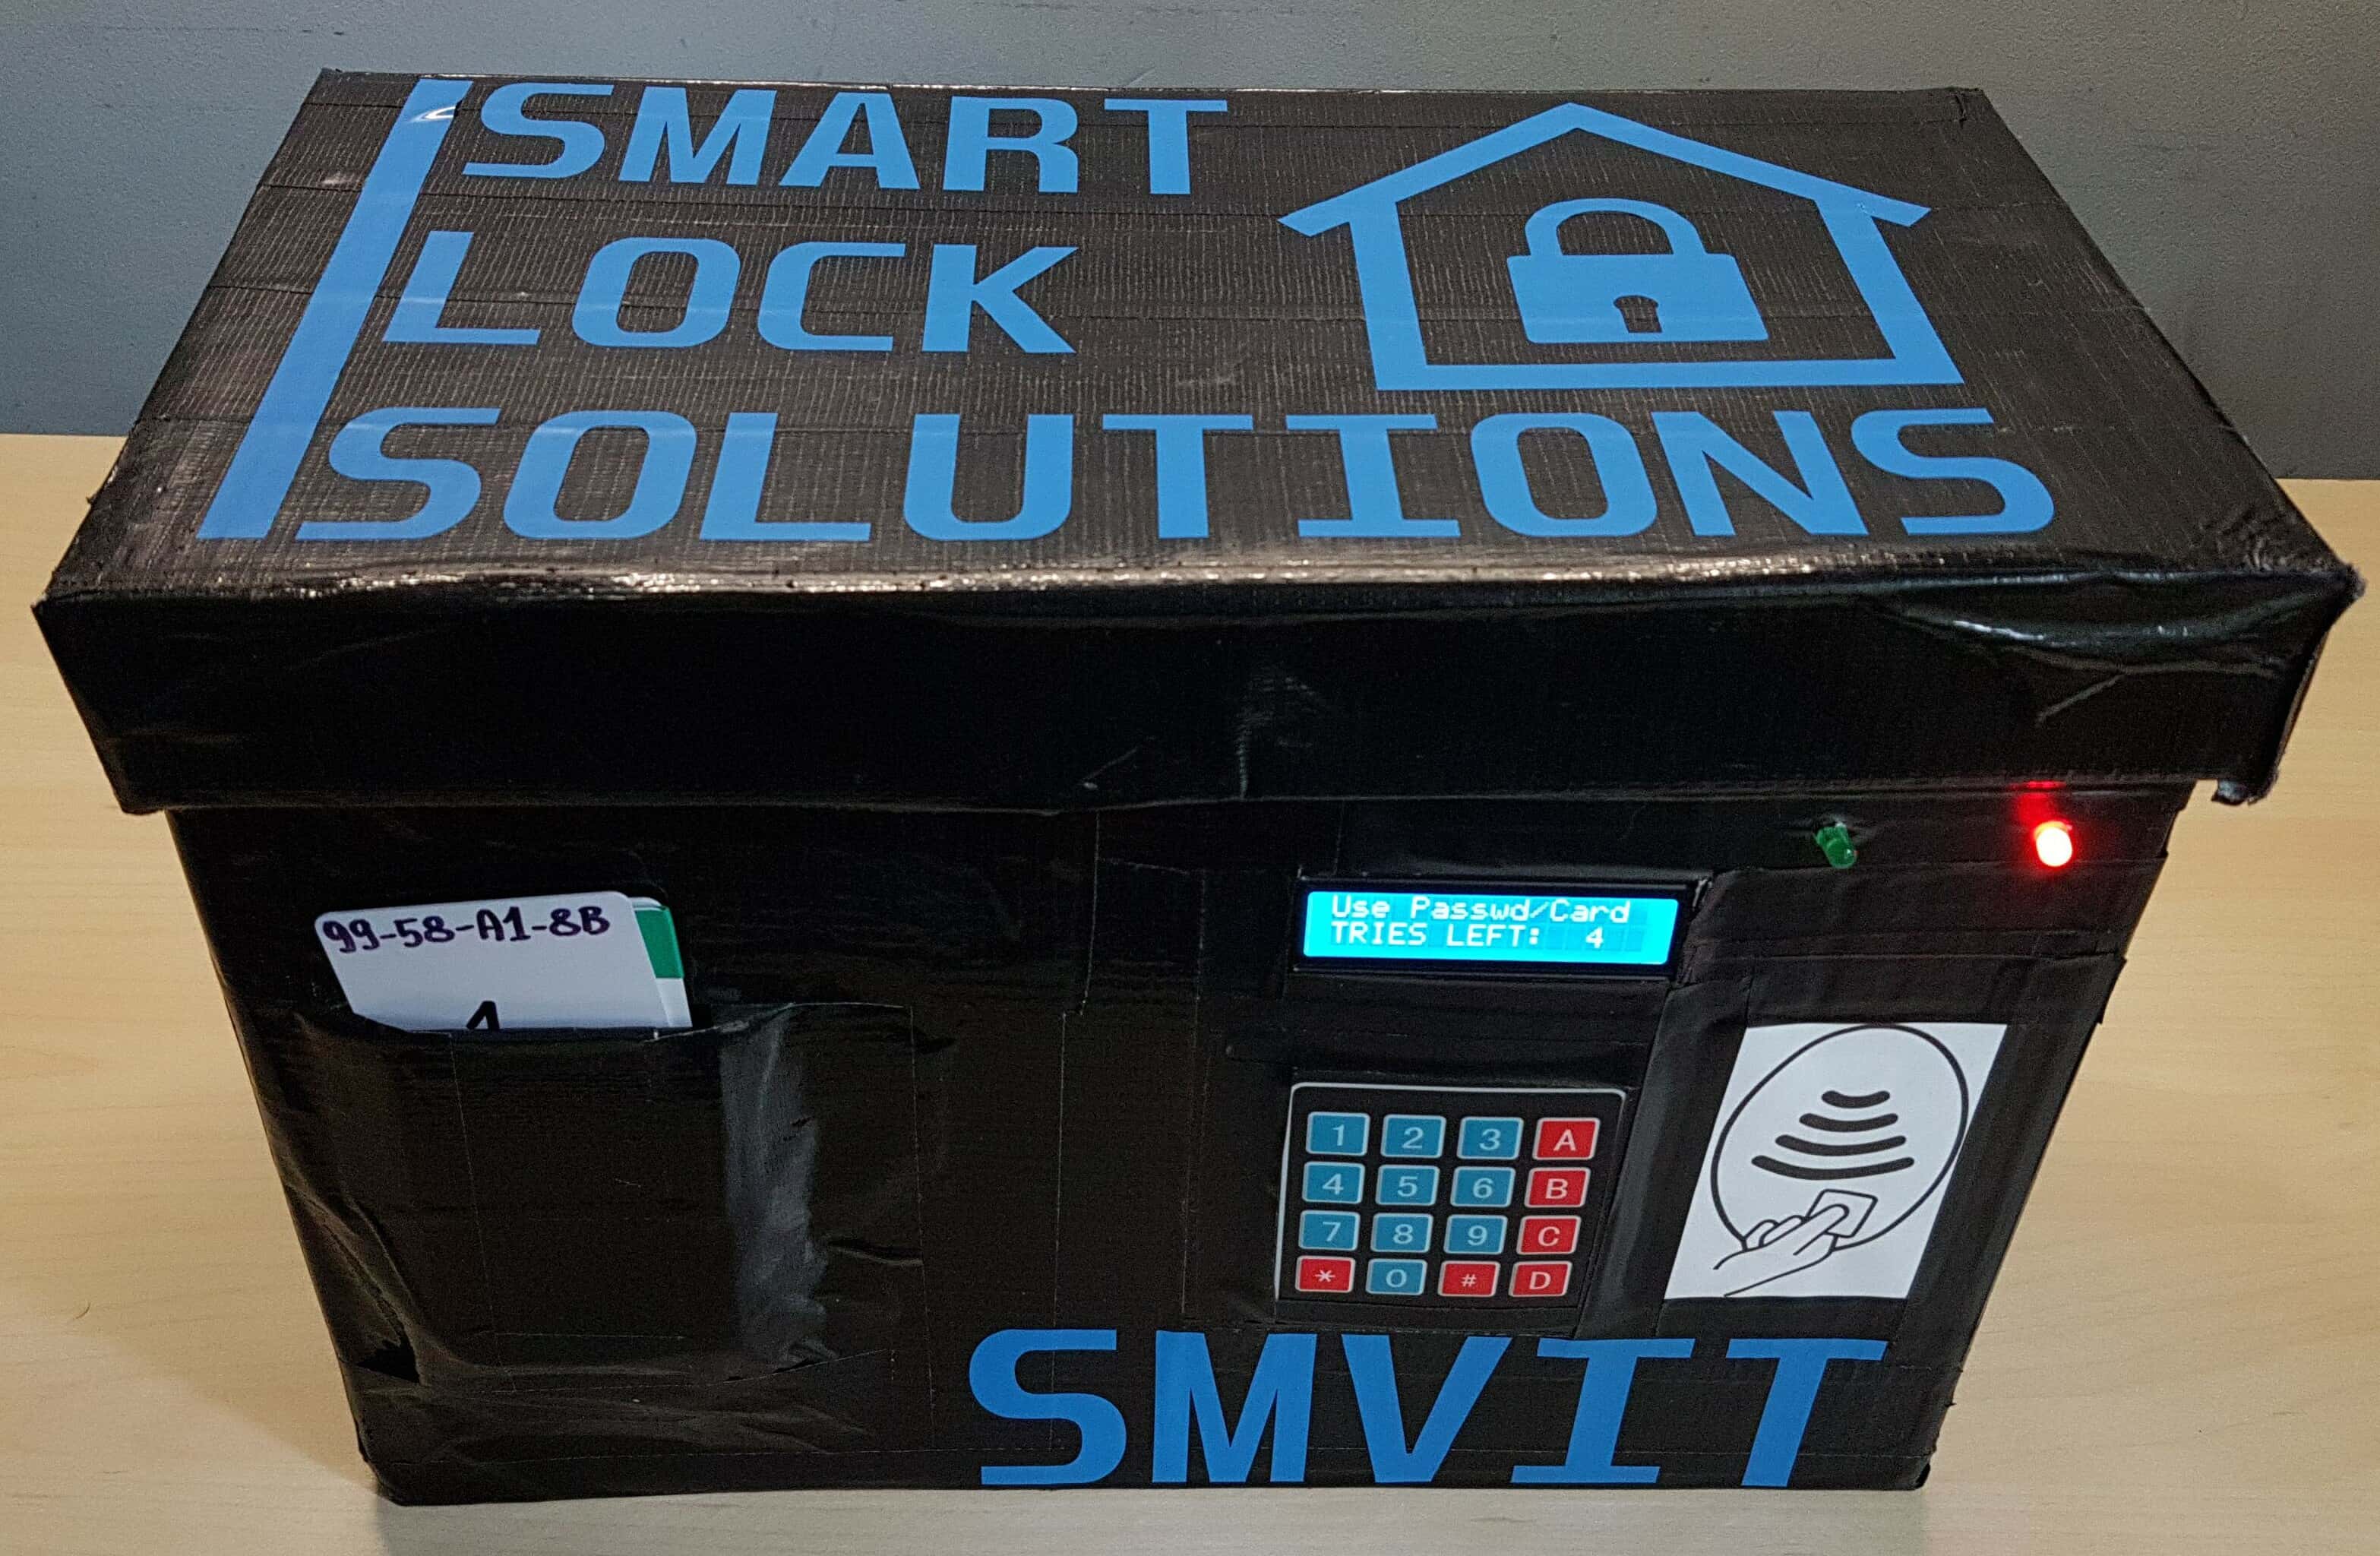
Safe/strongbox prototype - front.
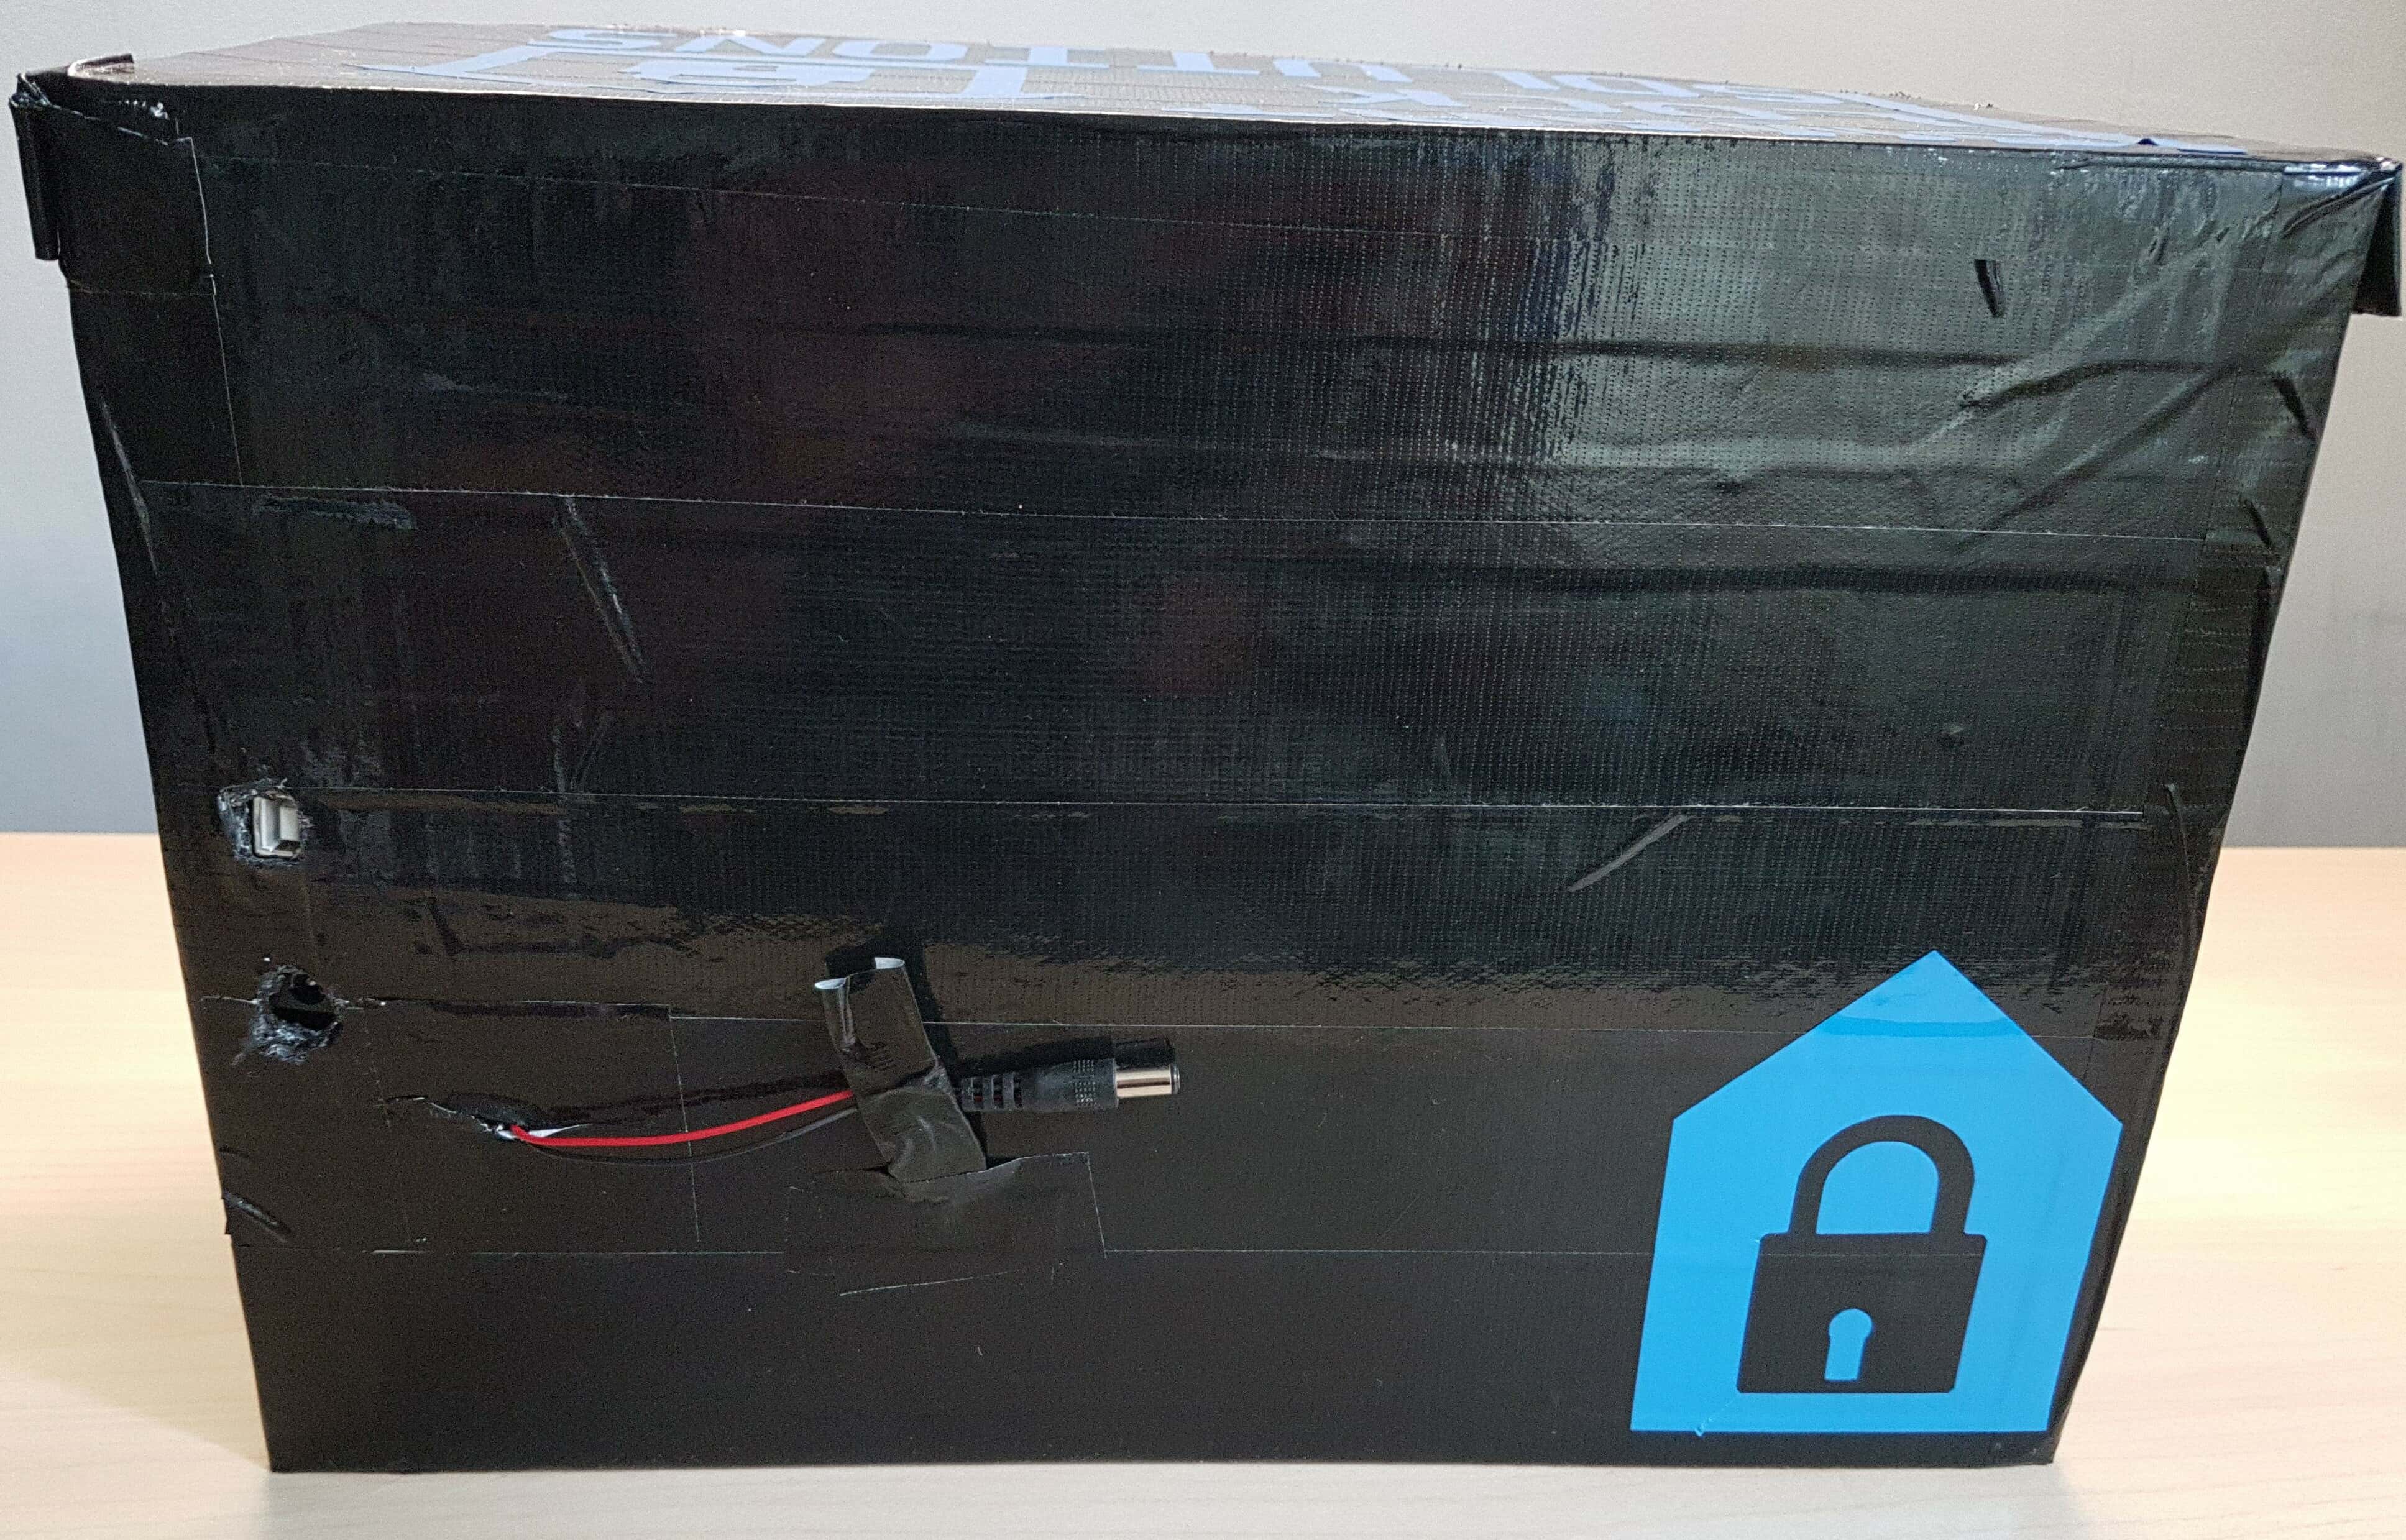
Safe/strongbox prototype - back.
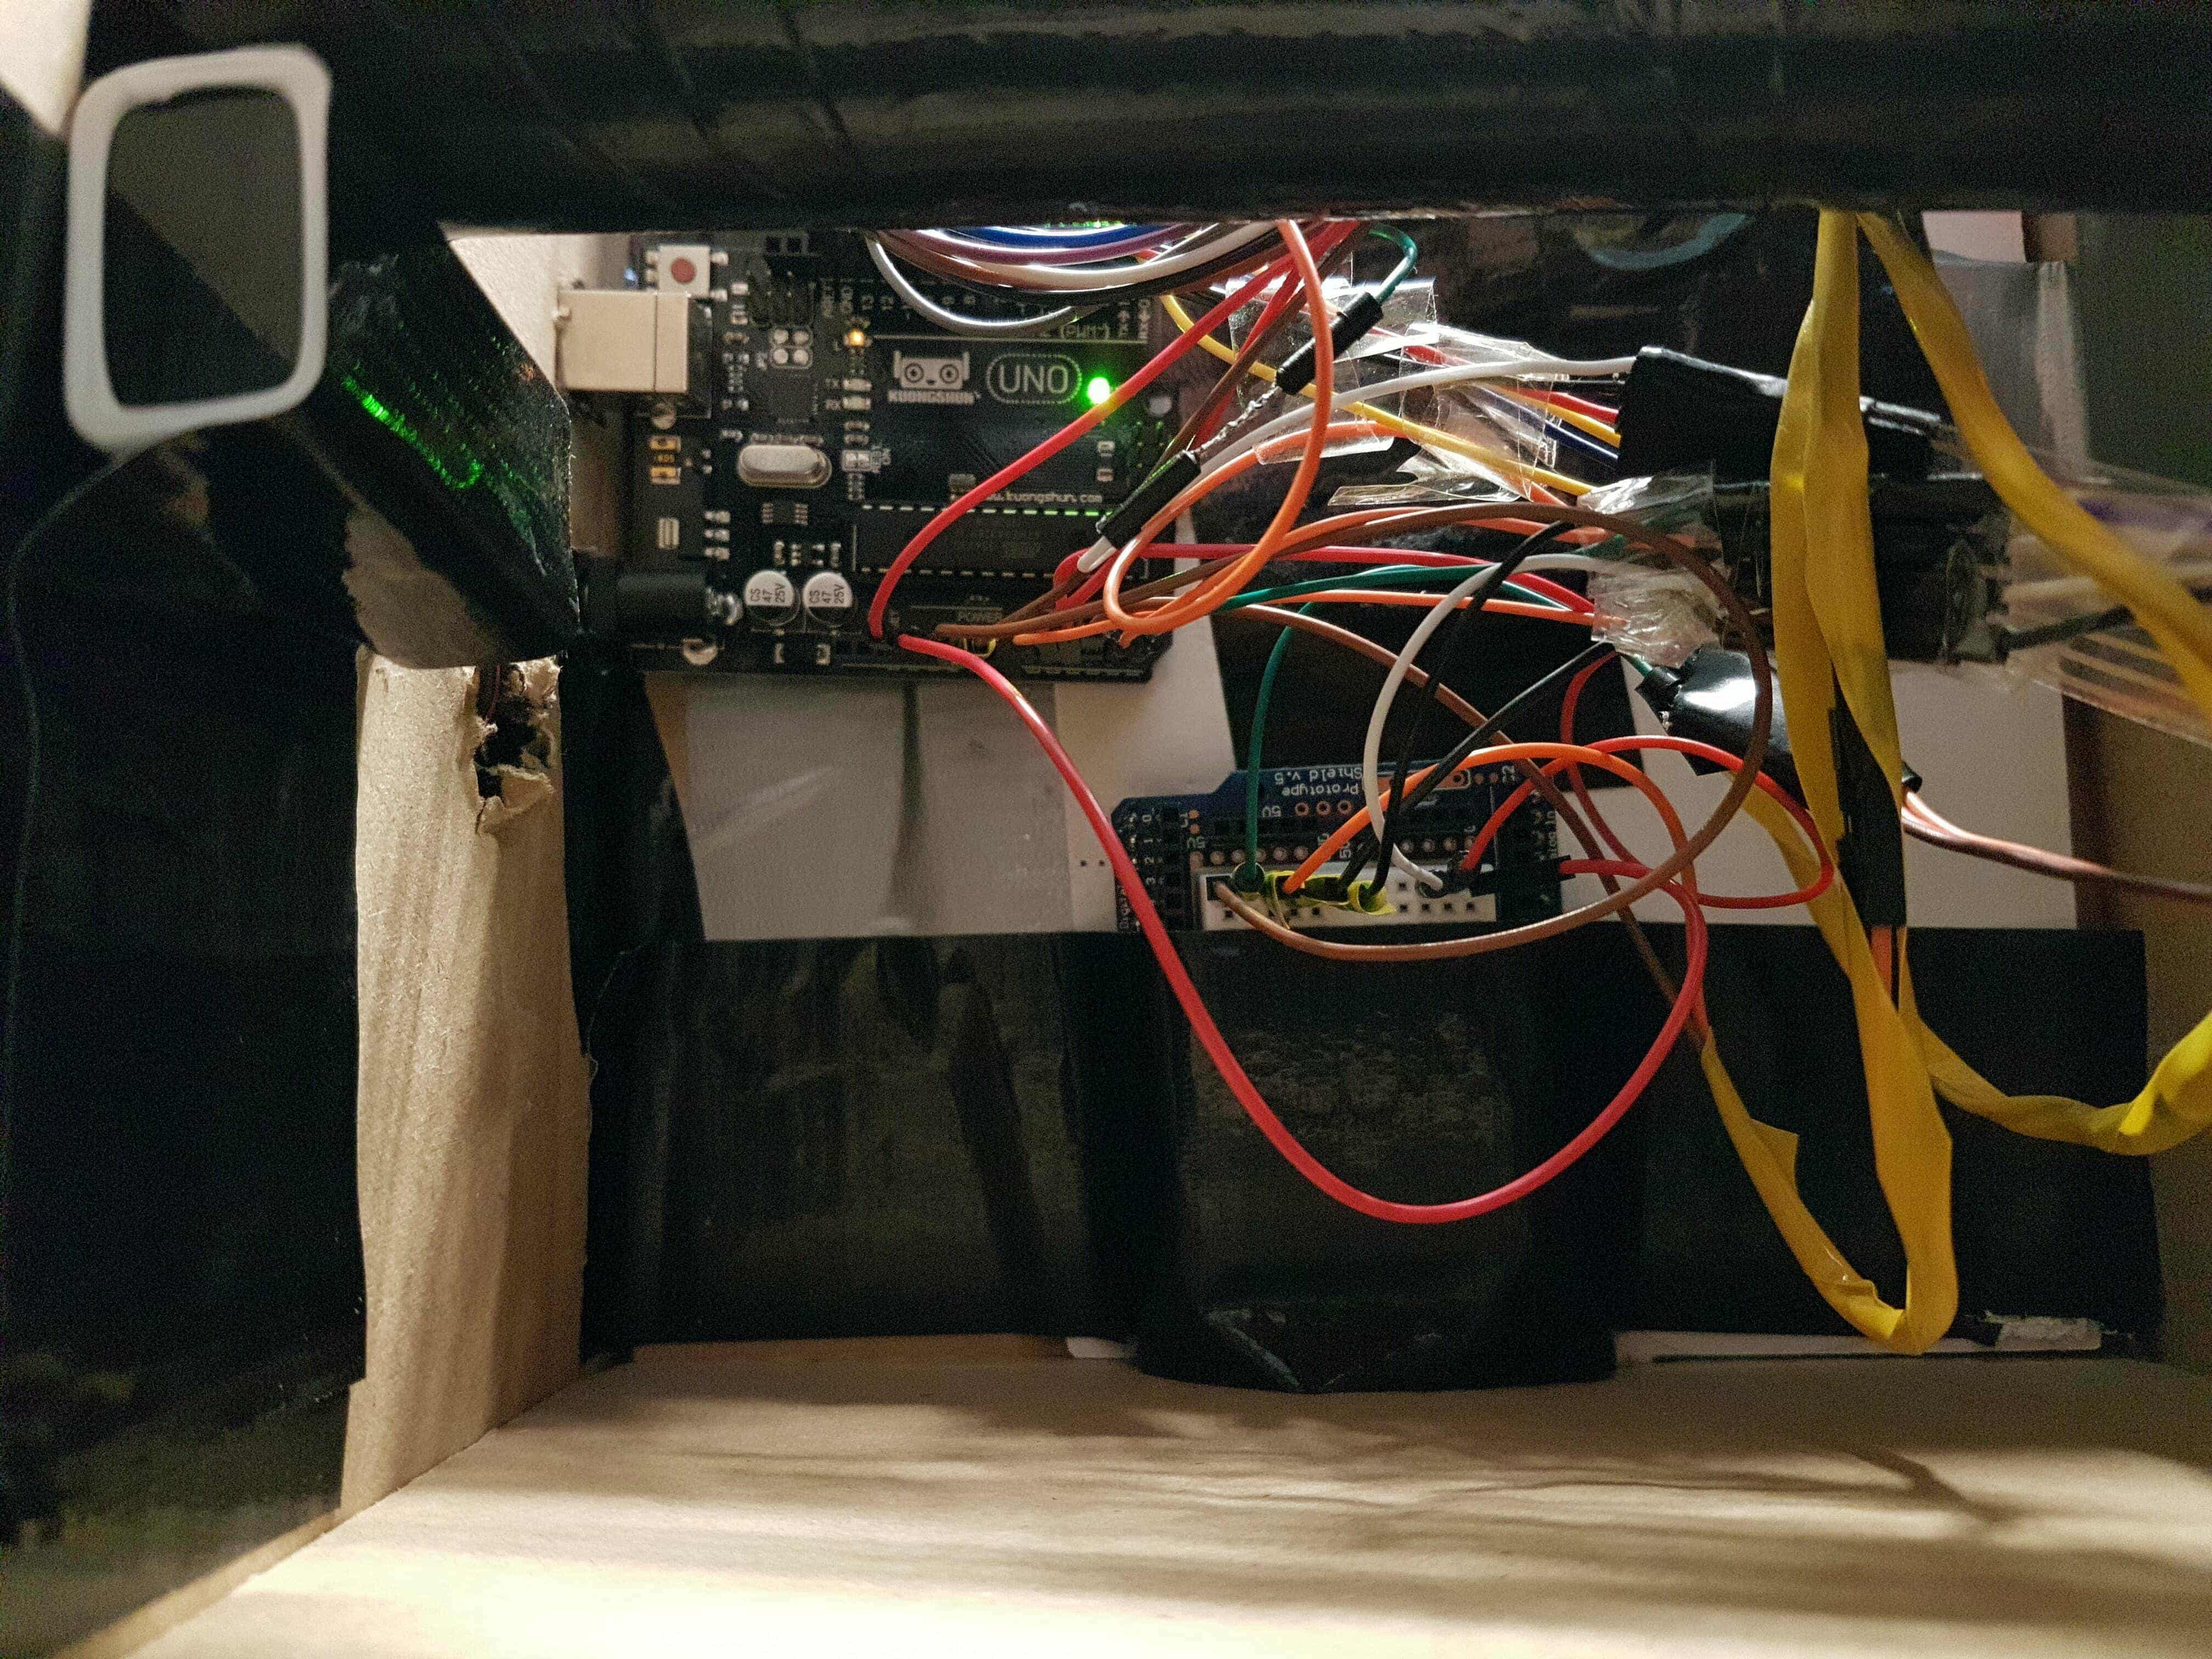
Safe/strongbox prototype - inside.
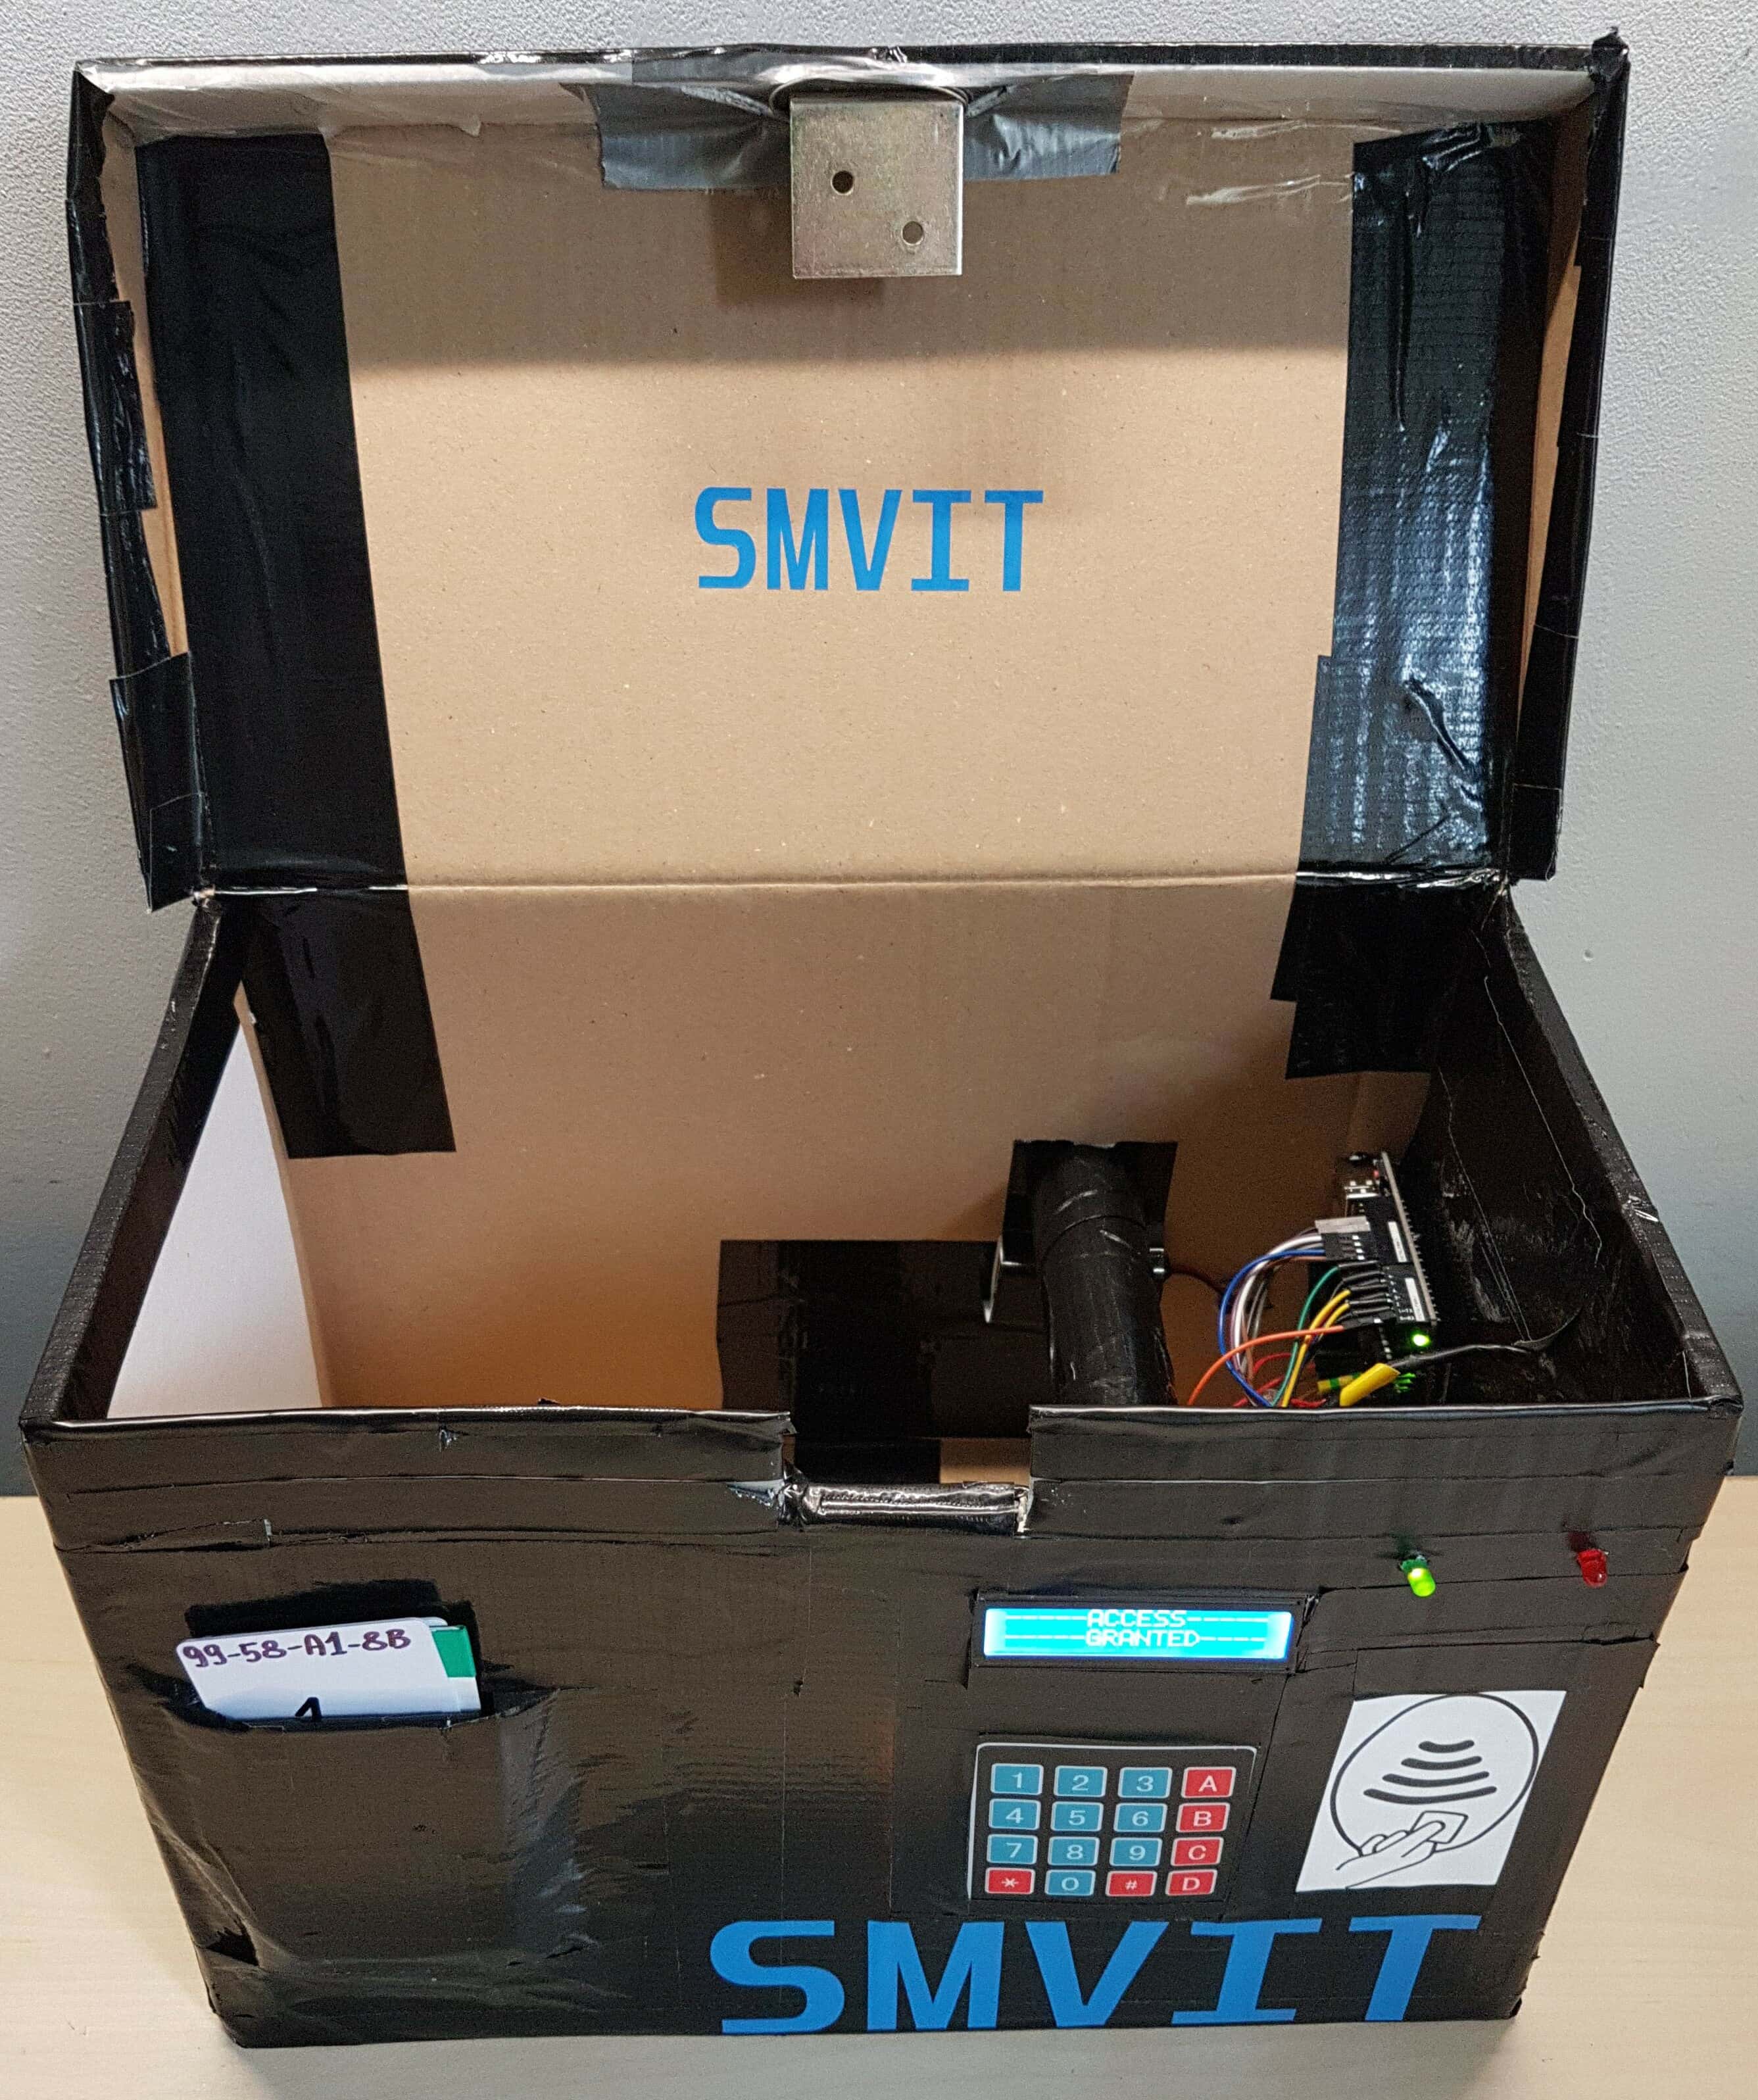
Safe/strongbox prototype - oepened.
 Safe/strongbox first prototype.
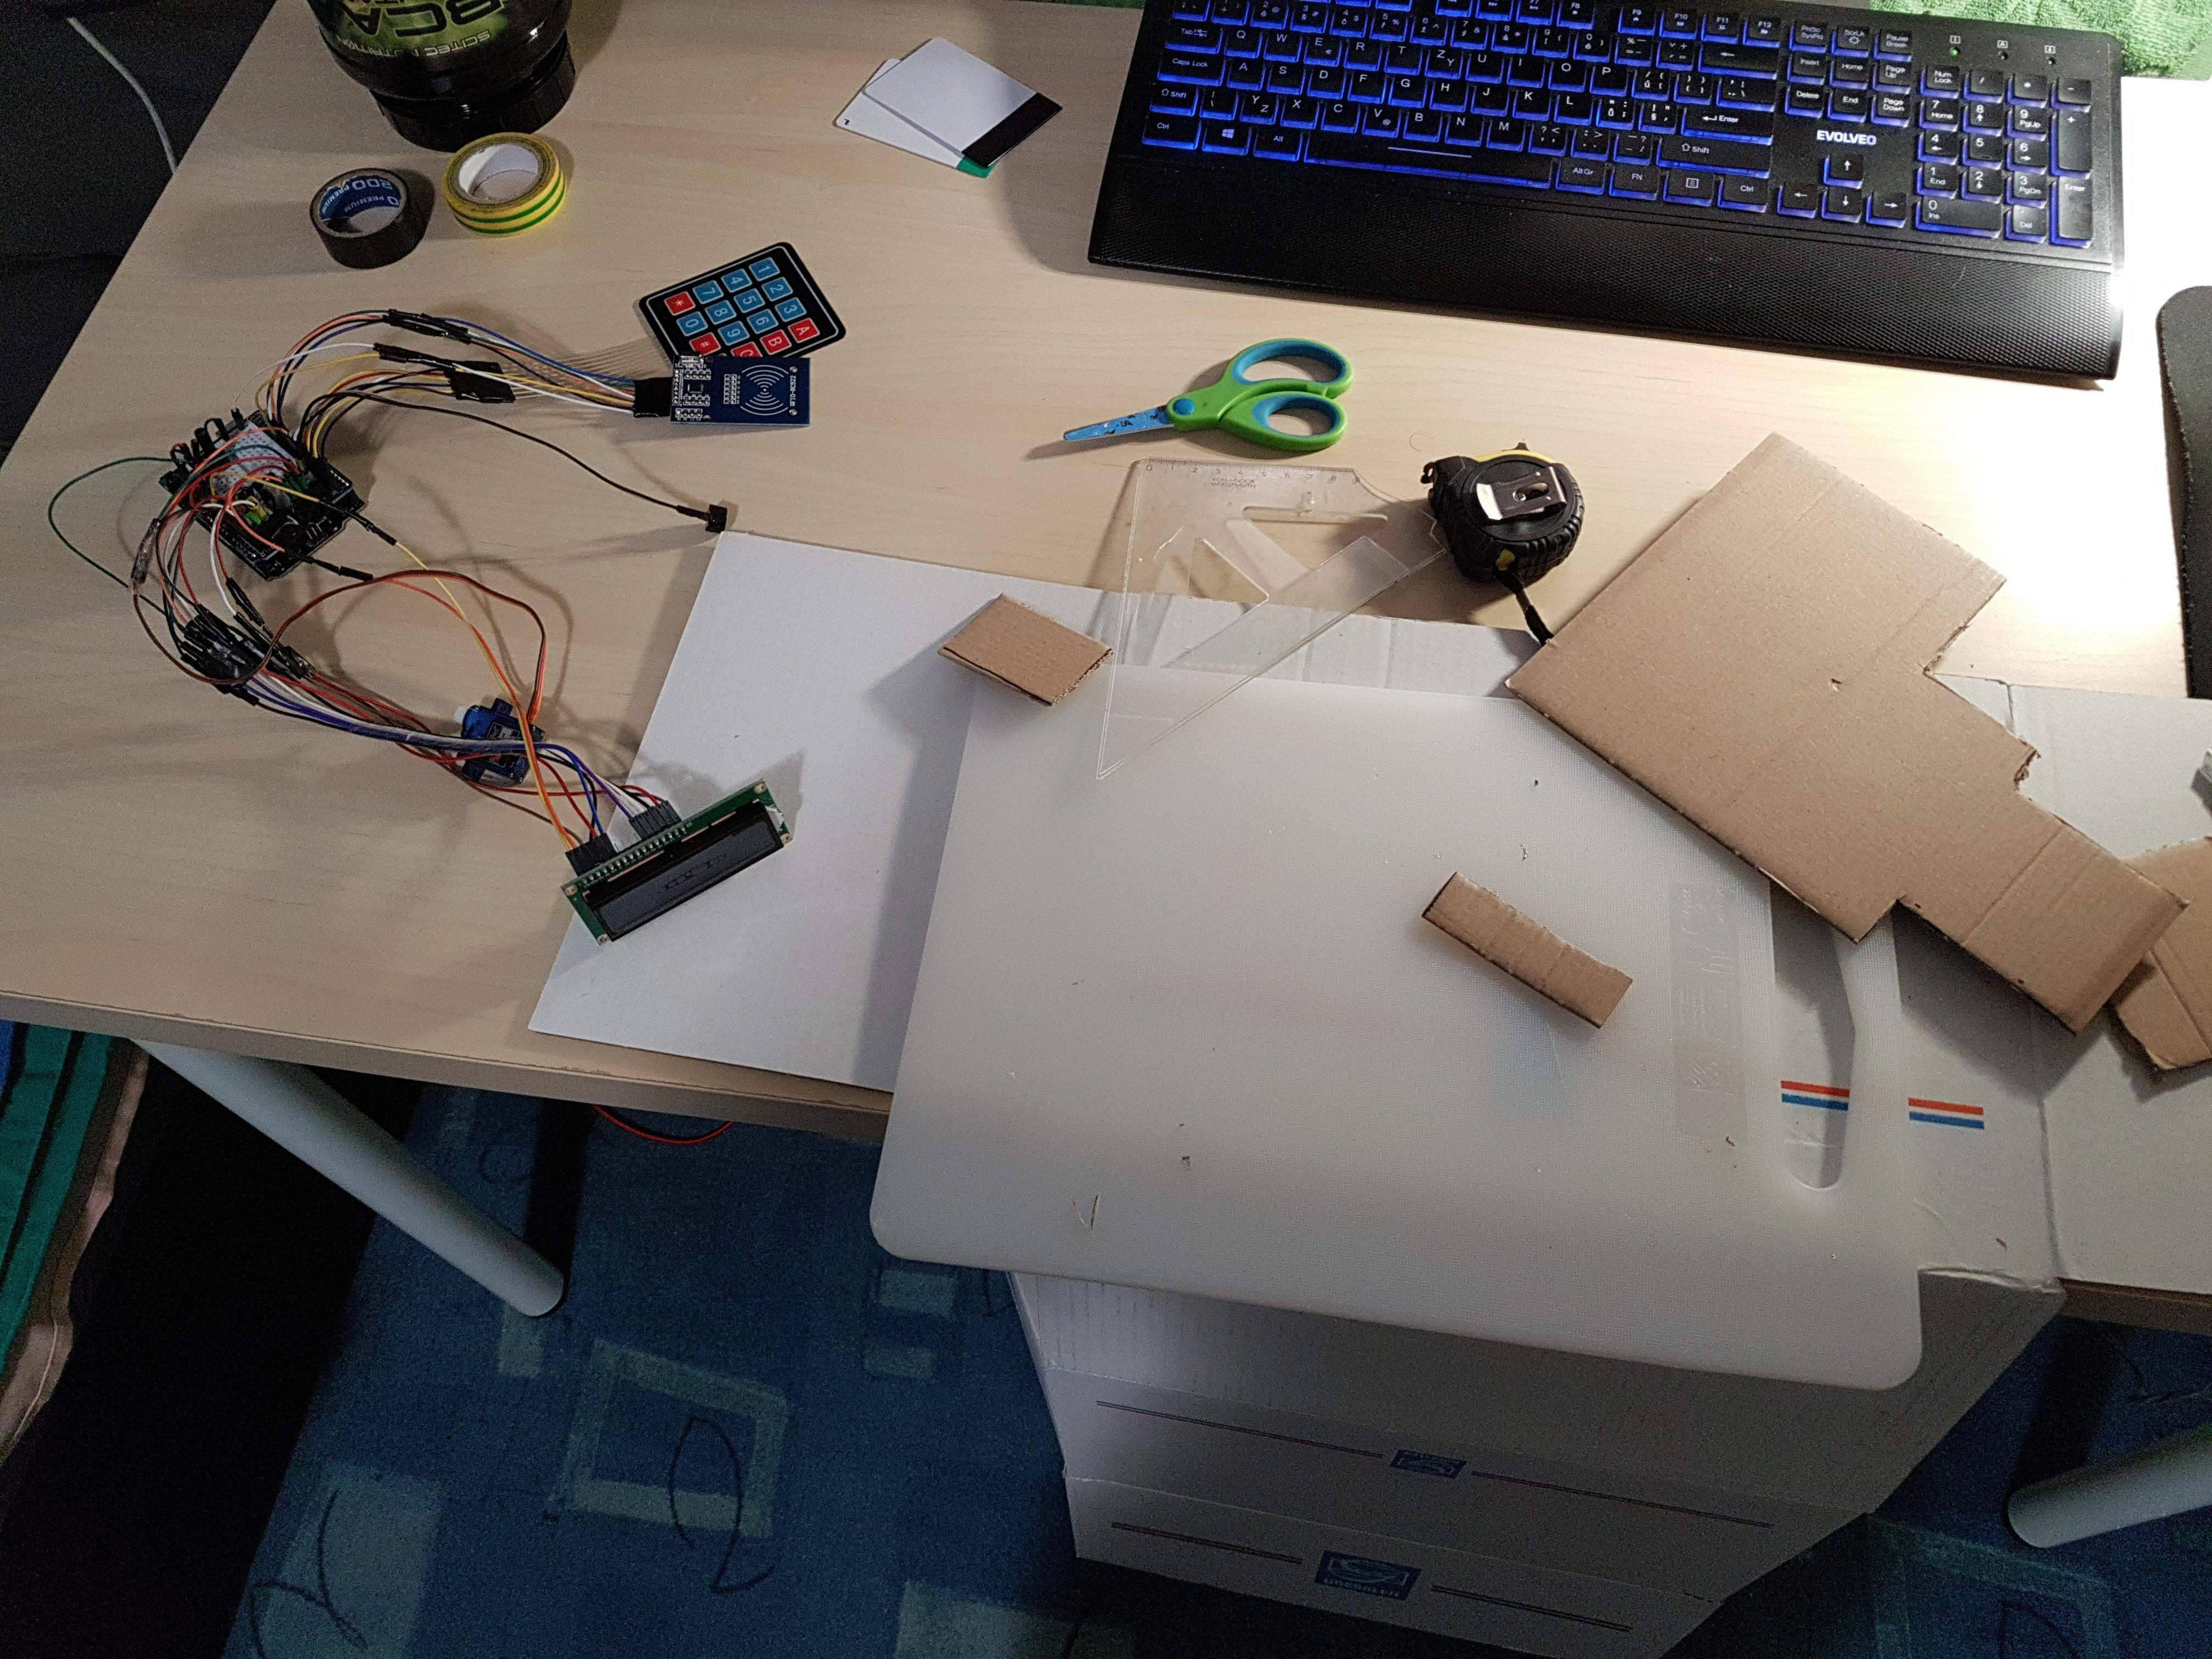 Safe/strongbox modeling.
Strana 2 z 2


 2023/2024