roman.kazicka@agnicoli.org
+421.918.901.732
  • Systémové myslenie v IT a Digitálna Fabrikácia
      • 2017-2018
      • 2018-2019
          • 2018-2019-Študenti
      • 2019/2020
          • Študenti
          • Projekty
              • 2019_P01
              • 2019_P02
              • 2019_P03
              • 2019_P04
              • 2019_P05
              • 2019_P06
              • 2019_P70
              • 2019_P08
              • 2019_P09
      • 2020/2021
          • 2020/2021-Studenti
          • 2020/2021-Projekty
      • 2021/2022
          • 2021-2022-Študenti
          • 2021-2022-Projekty
      • 2022/2023
          • 2022/2023-Studenti
          • 2022/2023-Projekty
      • 2023/2024 2023/2024
  • Prednášky
  • Systémové myslenie pri tvorbe IoT riešení
  • Kurzy
  • Workshopy
  • Kybernetické riešenia - Kybernetickým spôsobom
      • Finančná gramotnosť v inteligentných riešeniach-úvod
  • Nachádzate sa tu:  
  • Systémové myslenie v IT a Digitálna Fabrikácia
  • 2020/2021

2020/2021-Projekty

P01-2020-Bluetooth reprobox

Hodnotenie používateľov: 4 / 5

Links

  • video ukážka Bluetooth reproboxu
  • prezentácia
  • EA model

Konceptom projektu je vytvorenie vlastného bluetooth reproduktoru s pridanou funkcionalitou v podobe svetelných efektov.

Členovia tímu: Adriana Ághová, Zuzana Cukerová a Viliam Villár

Motivácia

Internetové obchody ponúkajú široký výber reproduktorov. Niektoré ľuďom umožňujú len počúvať hudbu iné pinášajú aj ďalšie pridané hodnoty. Jedným z týchto rozšírení sú svetelné efekty. Ako tímu sa nám myšlienka vylepšeného reproduktoru veľmi zapáčila. Reproduktor s pridanými svetelnými efektami taktiež považujeme za reálne využiteľný produkt. Myslíme si, že v aktuálnej dobe je po takomto produkte aj veľký dopyt. Veríme teda, že náš projekt môže byť kvalitným návodom ako si takýto reproduktor zostrojiť doma, či už v klasickej verzii alebo s pridanými svetelnými efektami.

Cieľ

Vytvorenie funkčného reproduktoru s možnosťou prehrávania hudby pomocou blutooth. Súčasťou reproduktoru by mali byť aj led svetlá, ktoré by bolo možné nastaviť za pomoci vytvorenej mobilnej aplikácie. Aplikácia používateľovi bude ponúkať rôzne možnosti nastavenia svetiel ako napríklad zvolenie počtu svietiacich letiek na základe hudby alebo tiež zvolenie menenia farieb na základe hudby.

Opis riešenia

V prvej fáze bolo potrebné si zozbierať nápady a myšlienky jednotlivých členou tímu. V tejto fáze prebiehali aktívne brainstormingy, ktorých výstupom bol prvotný návrh reproduktora.

HLA

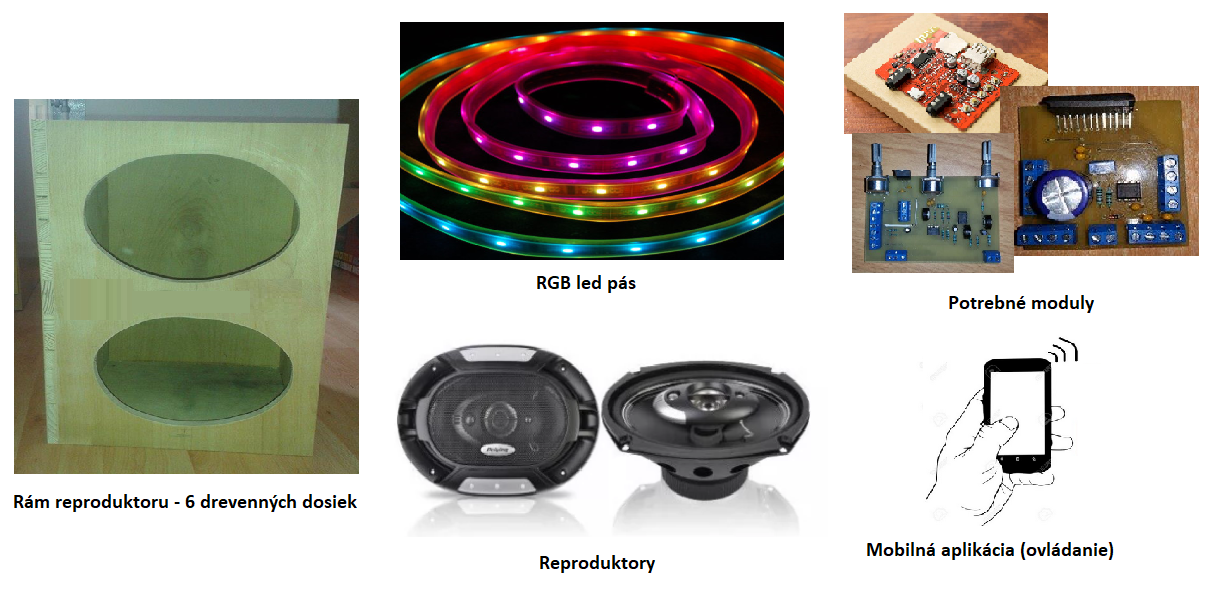
Na obrázku je možné vidieť základné časti reproduktora medzi, ktoré patrí 6 drevených dosiek predstavujúcich konštrukciu reprobedne. Ďalej samotné reproduktory, ktoré bude potrebné osadiť do skonštruovanej bedne a následne moduly, ktoré budú zabezpečovať všeobecnú funkcionalitu.

Jednou z hlavných požiadaviek po funkcionálnej stránke je potreba zabezpečenia komunikácie reproduktora s mobilným zariadením. Túto funkcionalitu zabezpečíme pomocou bluetooth modulu.

Bezdrôtová technológia BLUETOOTH je celosvetová štandardná forma bezdrôtovej komunikácie. To znamená, že elektronika vybavená bluetooth konektivitou môže navzájom medzi sebou komunikovať v dosahu cca 10 metrov. Naskytuje možnosť prenášať dáta, hudbu, alebo obrázky bez akéhokoľvek fyzického kontaktu. V našom projekte bude konkrétne využitý rádiový prenos hudby. Systém Bluetooth na tento prenos využíva nelicencované pásmo ISM (Industrial, Scientific, Medical), určené pre priemyselné, vedecké a lekárske aplikácie. V USA a v Európe (okrem Francúzska a Španielska) sa toto pásmo rozkladá medzi 2400-2483,5 MHz a v Japonsku medzi 2471-2497 MHz.

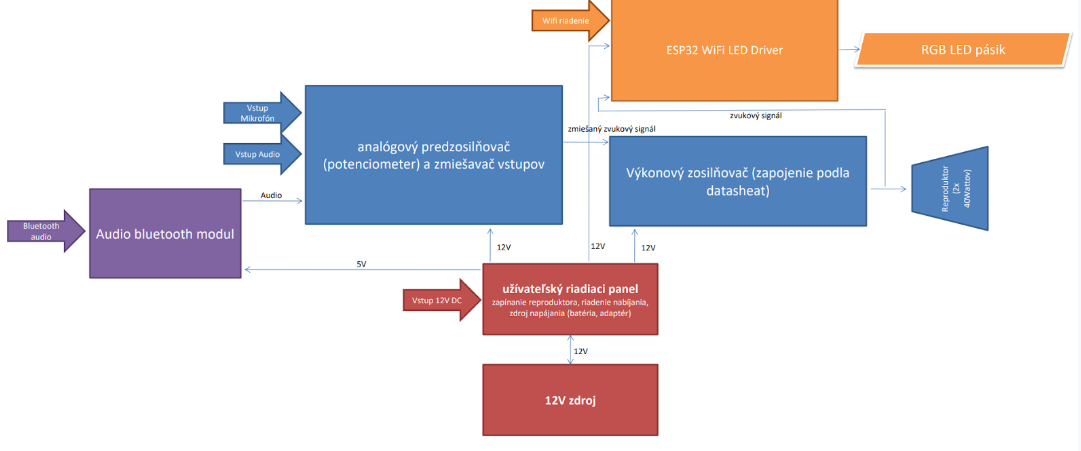
Ostatné funkcionality zaoberajúce sa nastavovaním RGB led pásu sú implementované v ESP32 prostredníctvom jazyka Arduino. ESP32 je duálna vývojová doska s režimami bluetooth a wifi. Pre celkovú funkcionalitu bluetooth reproboxu boli pravdaže potrebné aj ďalšie iné komponenty. Základnú high level architektúru reproiboxu je možné vidieť na obrázku nižšie.

P01 HLA

 Implementácia

V rámci implementácie časti projektu týkajúceho sa webového servera sme sa rozhodli pre využitie ESP32 ako prístupového bodu. Práve takéto nastavenie nám umožní pripojenie sa k MusikBoxu pomocou ľubovoľného zariadenia s funkciou WIFI, bez potreby pripojenia ESP32 k bezdrôtovému smerovaču (väčšina projektov).

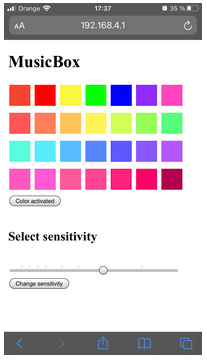
Implementácia webovej stránky poskytuje svojim používateľom niekoľko funkcionalít pre ovládanie farebných efektov spojených s prehrávaním hudby na našom MusikBoxe.

  • Provou z funkcionalít je nastavenie farby LED pásika.

Hoci počet rozsvietených LED svetiel závisí v každom prípade od veľkosti zvukového signálu, používateľ má možnosť voľby farby akou bude LED pásik rozsvietený. Používateľovi ponúkame širokú škálu pestrých farieb, ktoré zážitok z počúvania hudby dotvoria. Samozrejme, používateľ je schopný si túto farbu zmeniť v akomkoľvek bode prehrávania pesničky, a to len kliknutím na inú z ponúkaných farieb.

  • Druhou funkcionalitou je automatické menenie farieb.

Pre tých používateľov, ktorí radi nechajú voľbu farieb na náhodu, sme vytvorili možnosť automatického menenia farieb. Po zvolení tejto možnosti sú farby zvolené ako náhodné r, g, b hodnoty, ktorých hodnota sa však pri každom dosiahnutí maxima mení. To znamená, že farba sa mení pri silnej hudbe a teda môžeme povedať, že reaguje na hudbu.

  • Treťou funkciou je ovládanie rozsahu

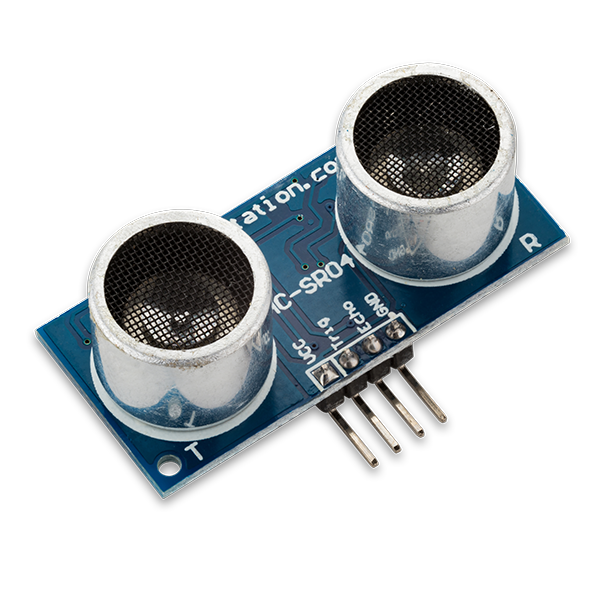
ESP32 sme si vybrali tiež kvôli možnosti spracovania analógového signálu. Čítanie analógovej hodnoty z ESP32 znamená, že môžete merať rôzne úrovne napätia medzi 0 V a 3,3 V. Namerané napätie sa potom priraďuje k hodnote medzi 0 a 4095, kde 0 V zodpovedá 0 a 3,3 V zodpovedá 4095. Keďže my chceme využívať plný rozsah LED svetiel aj v prípade, kedy je vstupné napätie menšie, vytvorili sme funkcionalitu, kedy si používateľ môže priamo, využitím webovej stránky, tento rozsah meniť.

Zaujímavou funkcionalitou je tiež takzvané smoothovanie. Keďže načítavanie vstupných hodnôt prebieha každých 5ms, častokrát ma vstupné napätie hodnotu 0V.  To znamená, že LED svetla by, hoci na mali okamih, zhasínali a vytváralo by to rušivý efekt. Naša funkcia si tak drží veľkosť posledného nameraného vstupného napätia o určitej hodnote rôznej od 0 po dobu 50ms alebo kým na vstup nepríde ďalšia hodnota rôzna od 0. Hoci táto doba nie je dlhá, zabraňuje blikaniu LED svetiel a vytvára tak príjemný používateľský zážitok.
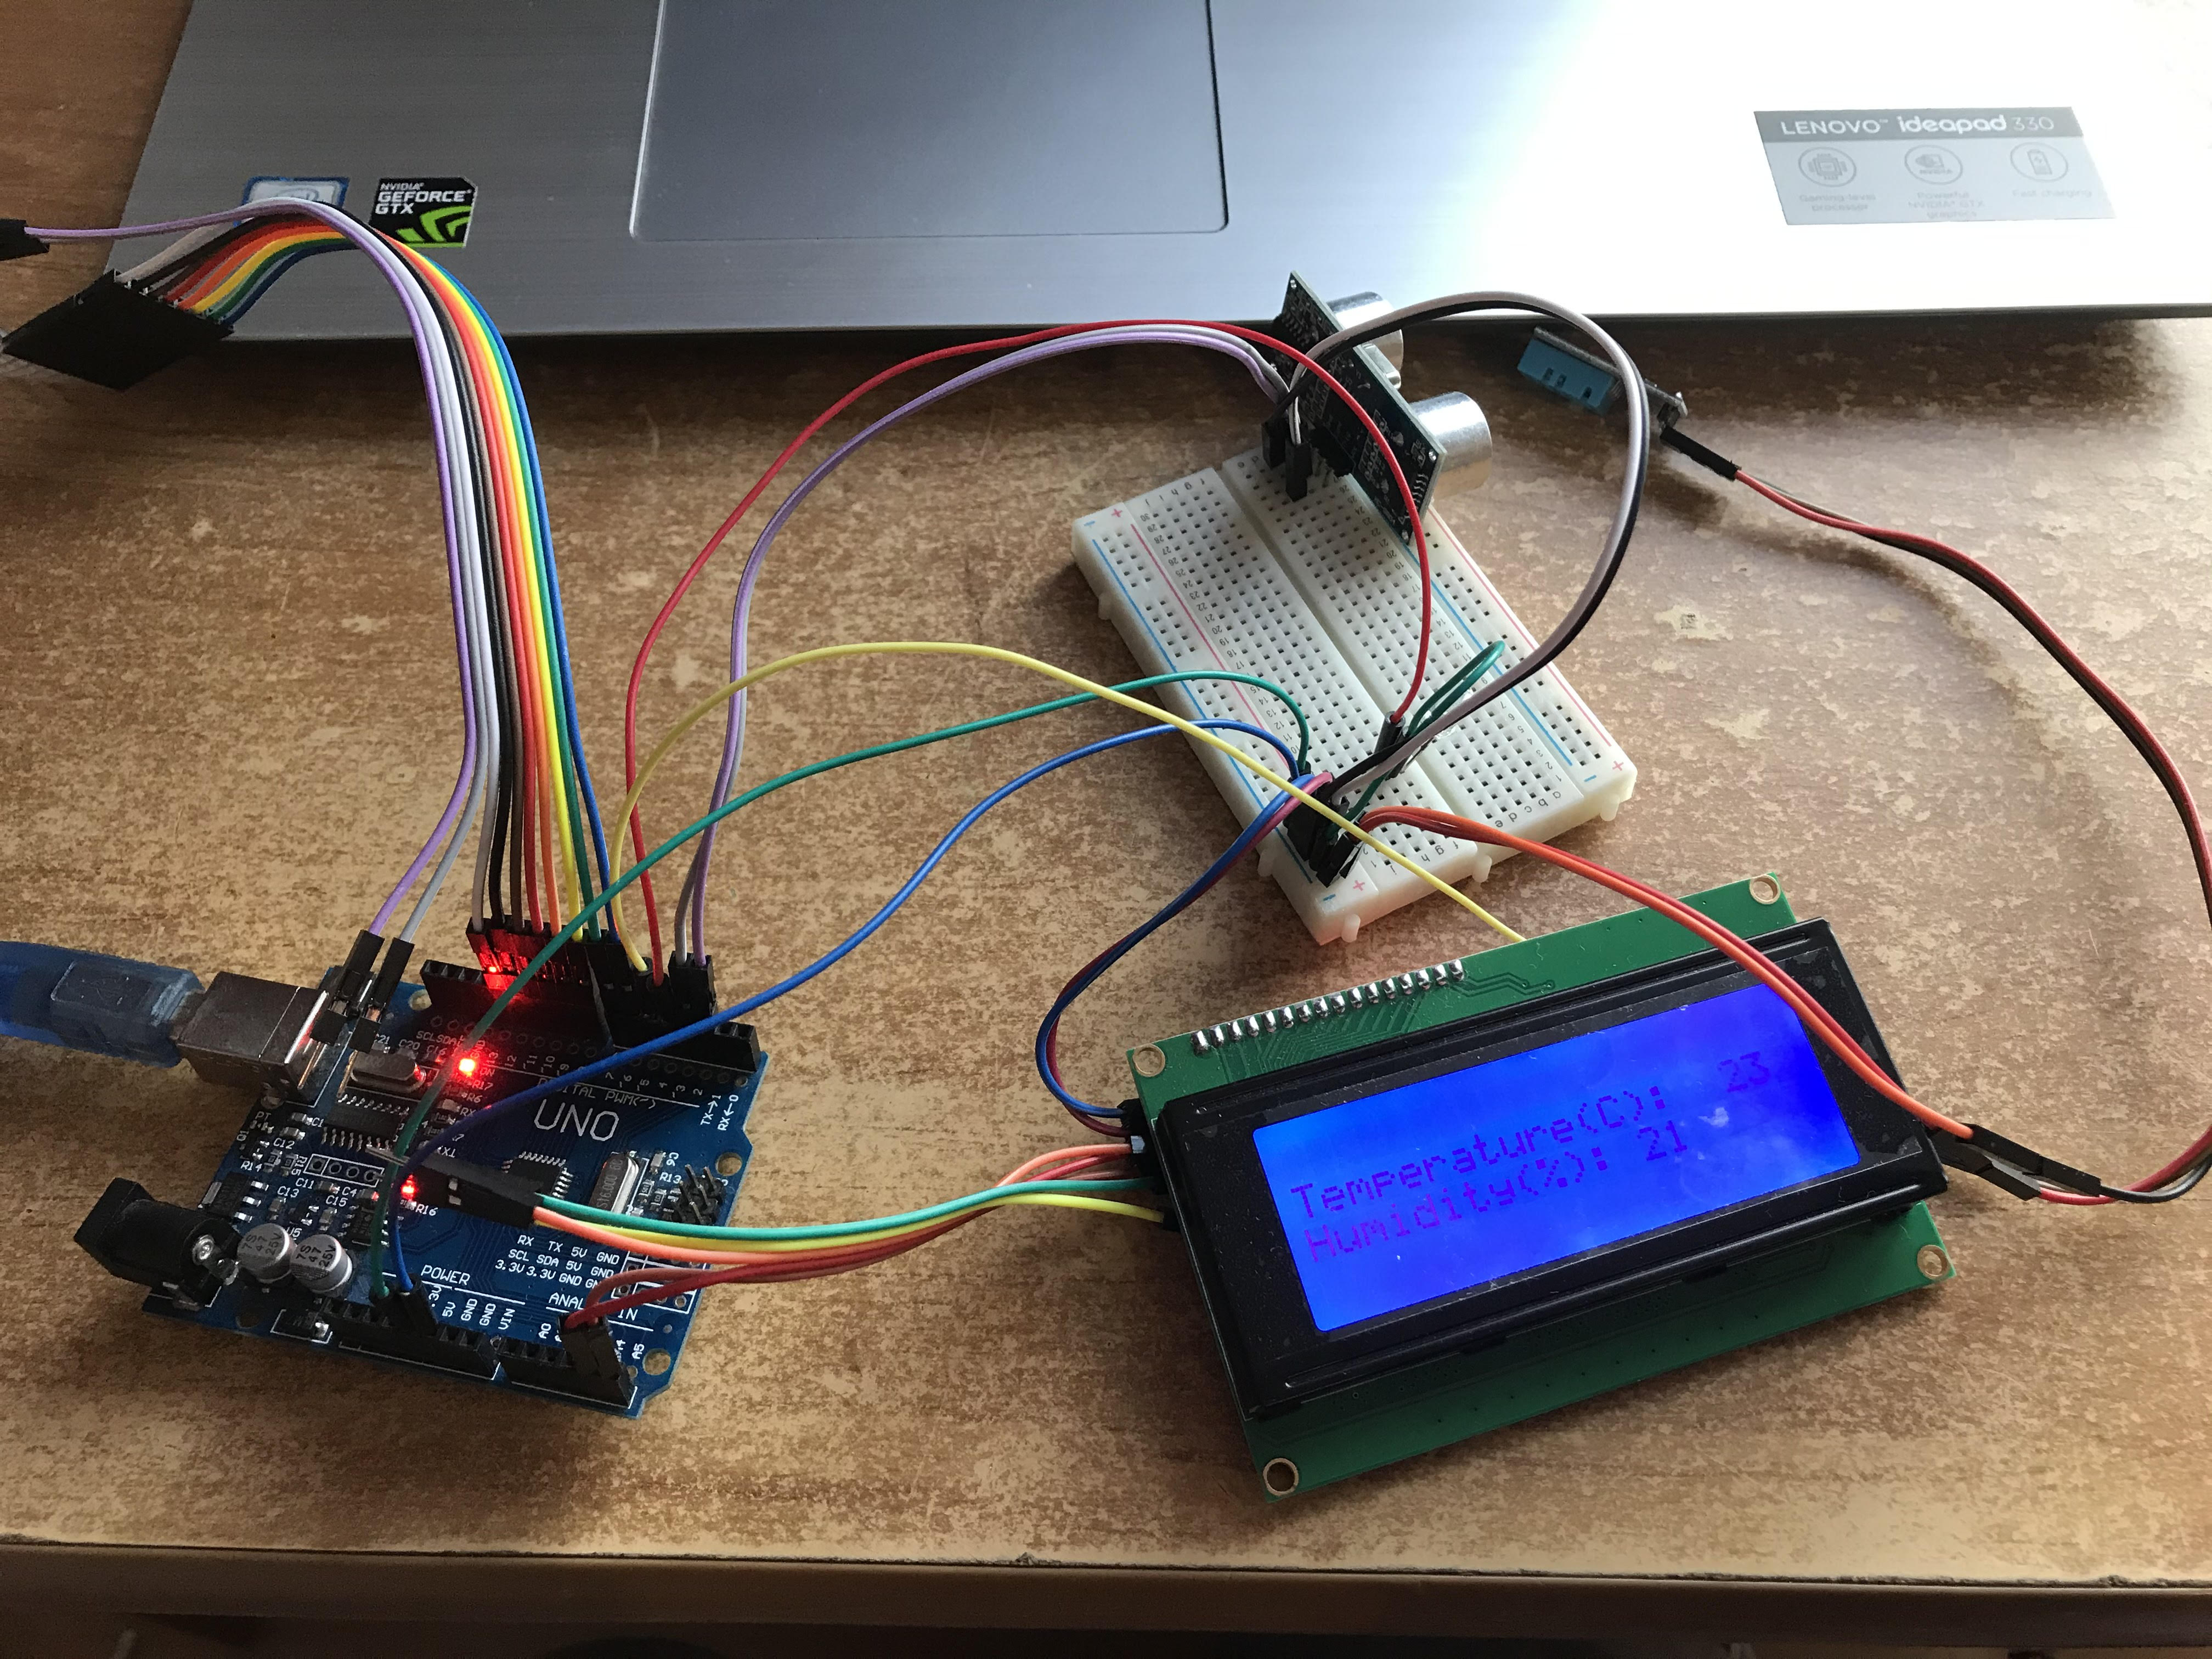
Testovanie

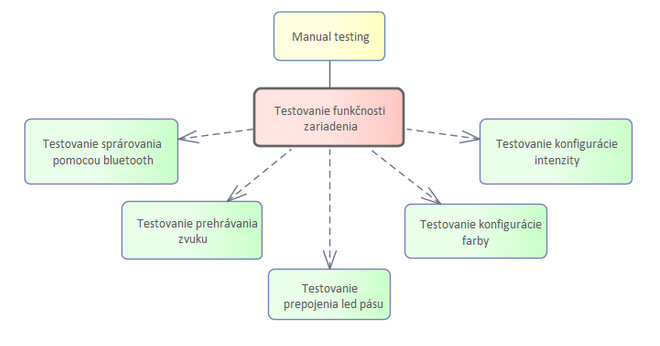
Fáza testovania prebiehala vždy po implementácii jednotlivých ucelených častí. Testovala sa postupne funkcionalita komunikácie reproboxu so zaradiením a následne aj funkcionalita spojená s pridanými svetelnými efektami. 

                      P1 testing

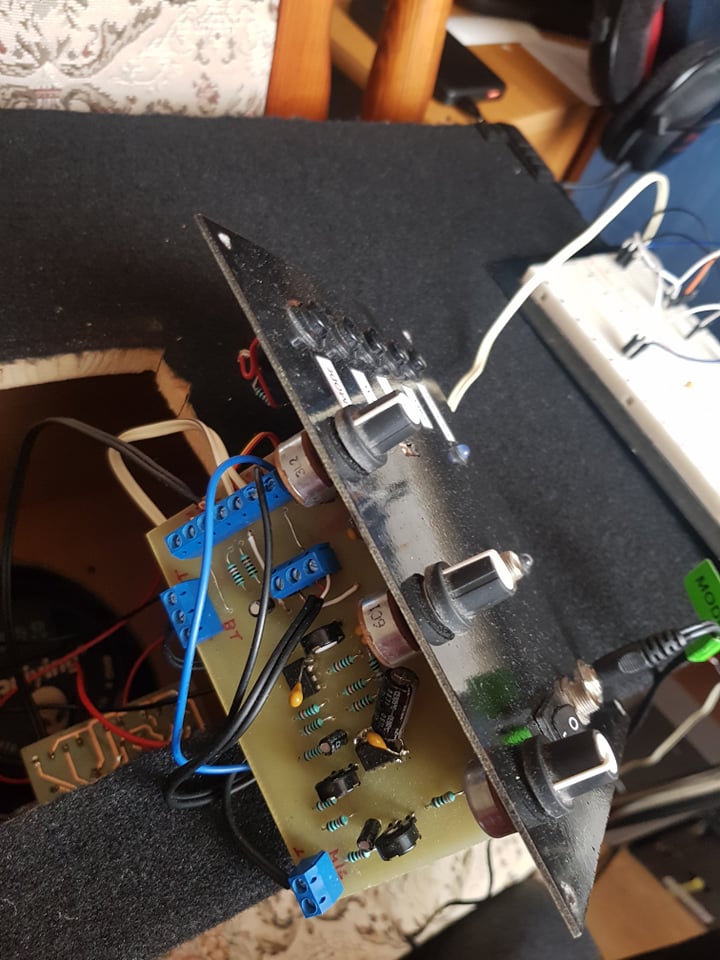
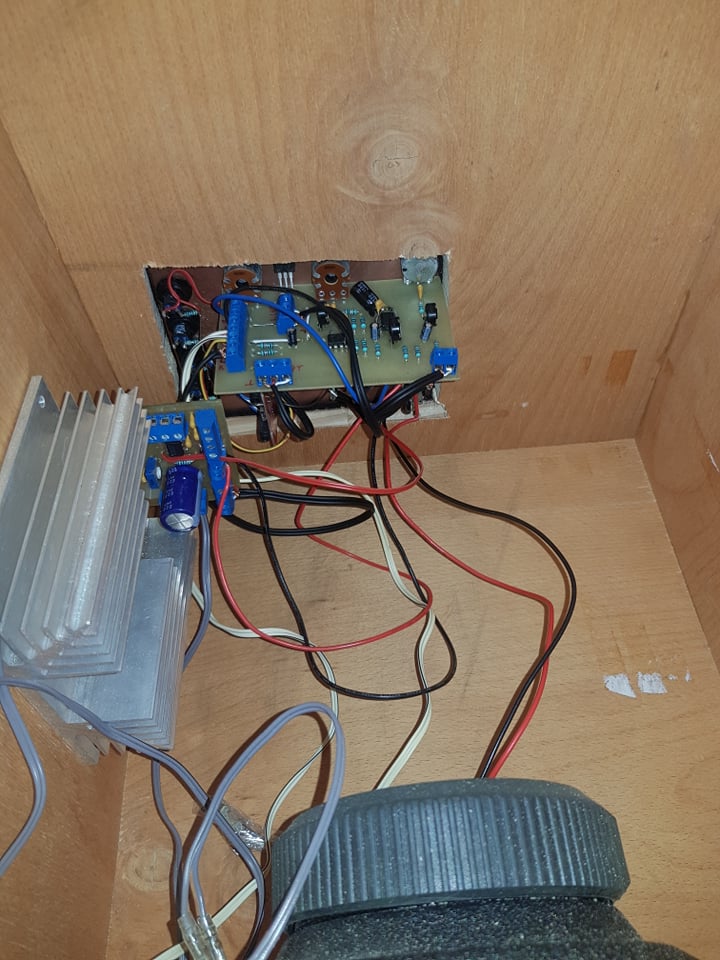
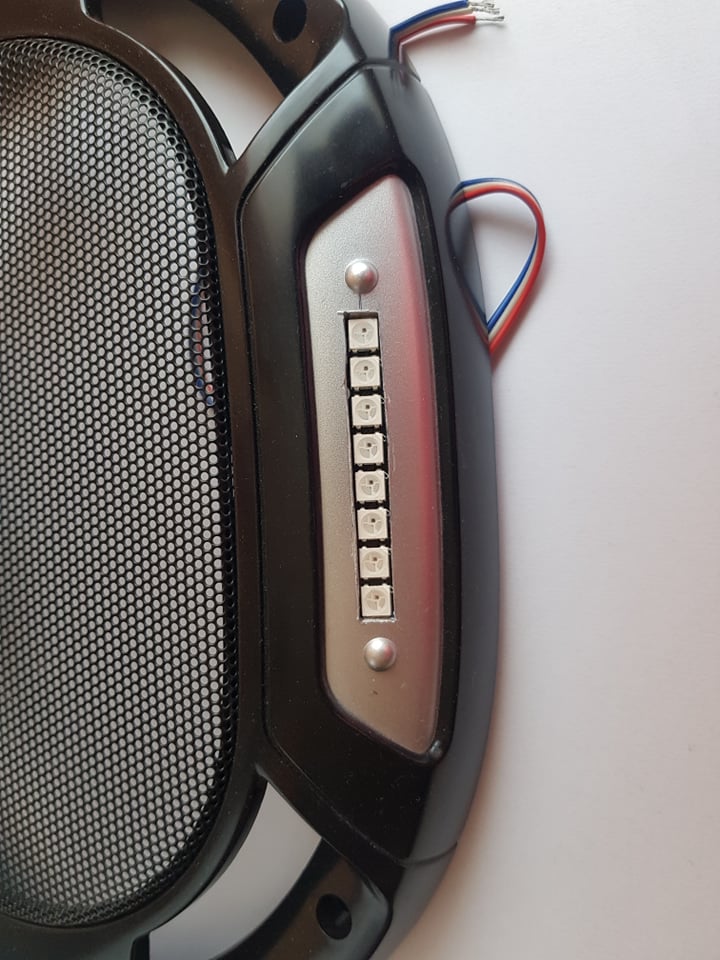
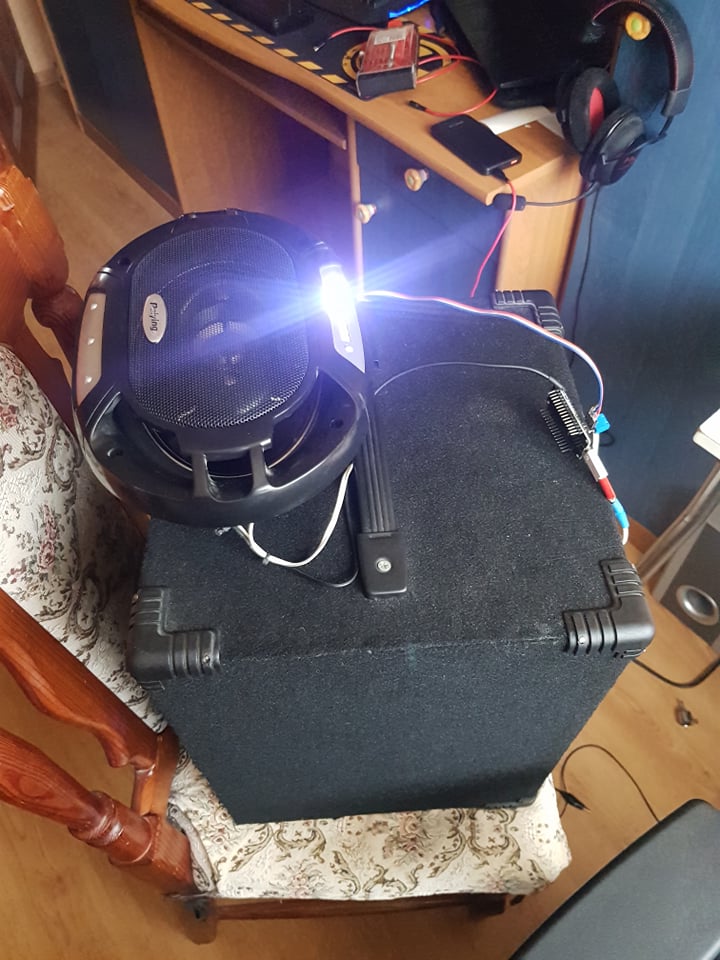
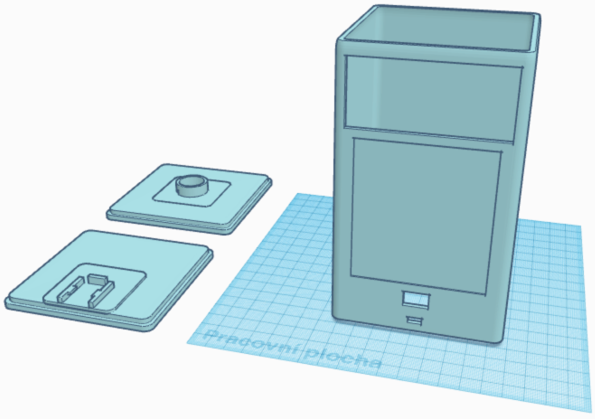
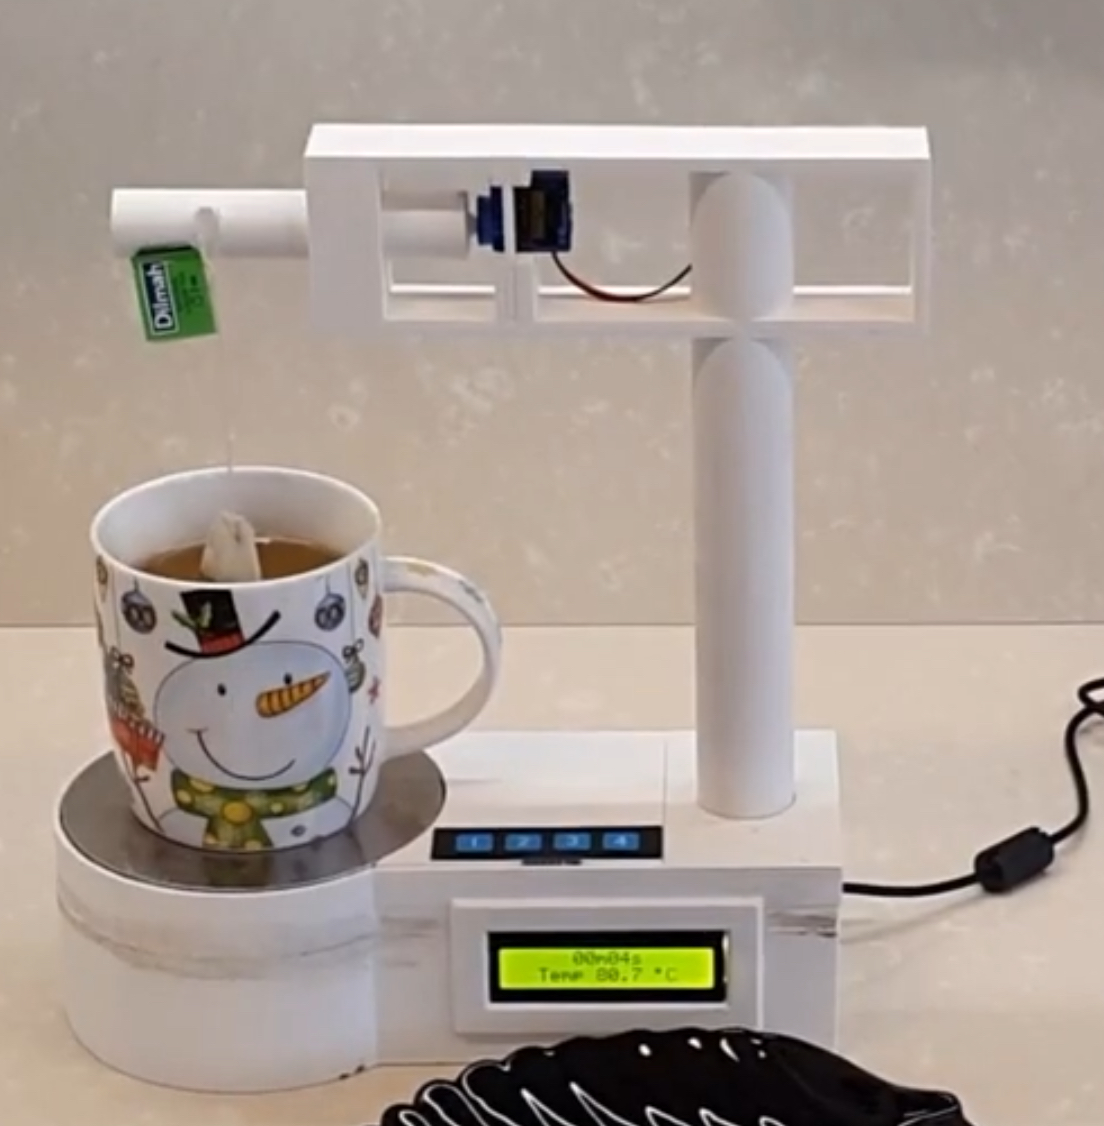
Ukážky konštrukcie reproboxu

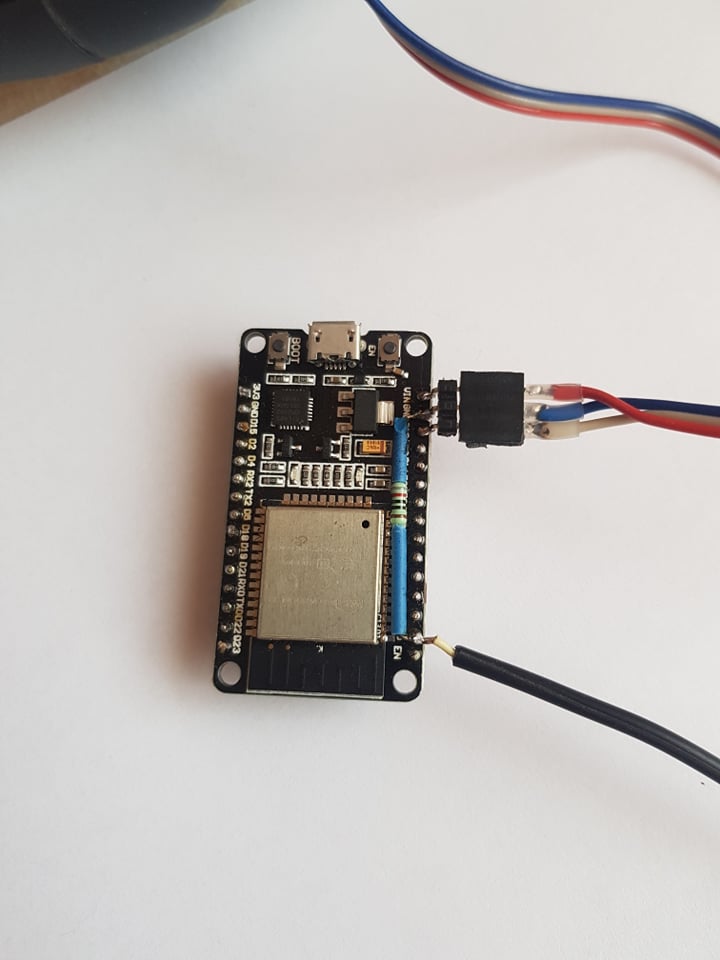
Na nasledujúcich obrázkoch je zachytený proces konštrukcie bluetooth reproboxu.

                       P1 ESP1          P1 reprobox

                       P1 RepIN          P1 reproduktorIN

                       P1 LED          P1 reproduktorLED

                                                                     P1 App  


  • Návštevy: 1238

P02-2020-Virutálne prepínače pre rôzne zariadenia v AR

Hodnotenie používateľov: 1 / 5

  • Návštevy: 808

P05-2020-Projekt: Robotic tortoise model with sensors

Hodnotenie používateľov: 4 / 5

Link to the whole tortoise EA project: 7Ds- Sensoric Tortoise - EA Model
YouTube video: https://youtu.be/PLxH1Dmp6Ro
Link to WikiFactory

Projekt: Robotic tortoise model with sensors

Autor: Maroš Čergeť

korytnacka

Project export I was working at during the winter semester 2020/2021. Export generated from Enterprise Architect. 


tortoise


The project I was working at was strongly influenced by the ongoing pandemic of the year 2020, so we could not meet with each other which slowed the learning process of Enterprise architect and forced everyone of us to be more self dependent. Teachers were trying to do their best, but everyone knows how staying at home and not having not enough movement can affect your performance (not only physical but also mental). Thus I leave it upon the viewer to be the judge whether is this project sufficionary or not. Everything is ready to be 3D printed, code is written, only the components like Raspberry, ... are not available.

  • Návštevy: 879

P04-2020 Lampa reagujúca na pohyb

Hodnotenie používateľov: 4 / 5

Video ukážka fungovania senzoru pohybu

Projekt Lampa reagujúca na pohyb - EA Model

Členovia tímu: Katarína Jánošová, Vanessa Kadeřábeková

Motivácia 

V dnešnej dobe je pre ľudí veľmi dôležitým faktorom života pohodlie a spokojnosť. My sme sa v projekte zamerali na vytvorenie lampy, ktorá sa dá ovládať pomocou pohybového senzoru. Predstavte si, že si večer unavený ľahnete do postele a vypínač vašej stolnej lampy je príliš ďaleko. Nie je to veľmi príjemné a preto sme sa rozhodli navrhnúť lampu, ktorú bude okrem normálneho vypínača možné ovládať aj pohybom. Okrem tejto funkcionality ponúka lampa aj možnosť zobrazenia teploty a vlhkosti v miestnosti, a to pomocou LCD displeja, ktorý má v sebe zabudovaný.

Cieľ

Cieľom daného projektu bolo vytvorenie lampy s rôznymi senzormi, ktoré by dokázali adekvátne reagovať na ľudský pohyb, vlhkosť a teplotu okolitého vzduchu a na základe týchto parametrov by daná lampa dokázala pokrývať potreby používateľa.

Lampa a jej komponenty a časti

Ultrazvukový senzor sme využili na zistenie prítomnosti pohybu, pomocou ktorého sa mení stav lampy na zapnutý a vypnutý. Senzor HC-SR04 sme používali na detegovanie pohybu, aby sme tak vedeli zmeniť stav lampy.

DHT11 senzor sme využili na meranie aktuálnej teploty a vlhkosti okolitého vzduchu, ktoré následne vizualizujeme pomocou LCD obrazovky a používateľovi poskytujeme na lampe dodatočné informácie o interiéry.

Pri vytváraní návrhu lampy, sme vytvorili návrh aj v aplikácii pre 3D tlač. Tento návrh sme však už ďalej nerealizovali, z dôvodu pandémie. Takto vyzeral návrh 3D komponentov našej lampy:

Pri implementácii sme vytvorili prototyp konečného riešenia. Naša lampa, ktorá v prototype mala iba jedno svetielko, reagovala na pohyb v určitej vzdialenosti a na základe neho menila svoj stav na zapnutý a vypnutý. Ďalej sme v prototype vypisovali údaje o teplote a vlhkosti miestnosti na LCD Displej. 

Ak by sme v práci pokračovali, skúsili by sme si vytlačiť náš návrh v 3D tlačiarni a spojazdniť ho. V implementácii by sme umožnili používateľovi pomocou klávesnice nastavovať vzdialenosť merania pohybu a časovač vypnutia lampy. Následne by sme vytvorili jednoduchú webovú aplikáciu, kde by sme tiež zobrazovali údaje o prostredí a v ktorej by si vedel používateľ nastavovať časovač a ovládať lampu.


  • Návštevy: 876

P06-2020 Plant monitoring

Hodnotenie používateľov: 5 / 5

Team members:
S06 Marek Drgoňa
S11 Veronika Klaciková

Link to the EA project

Link to wikifactory project presentation: https://wikifactory.com/+fablabbratislava/plant-monitoring

Goals and Expectations

Our goal is to propose a system used for monitoring plants, which collects data from sensors (such as temperature, humidity, etc.) and evaluates them. System also notifies user when measured values are different from recommended values for specific monitored plant.
Our expectations from this project are:
  • gain knowledge about growing plants
  • improve skills in Enterprise Architect
  • gain basic experience with hardware

Personas

We identify the following personas:
  • gardener
  • inexperienced plant grower
  • busy or lazy man
  • man away from home for a long time
Their problems and needs are shown in diagram

Functional requirements

Non-functional requirements

Components

  • Controller is receiving data measured by sensors. Sensors are inserted into the soil or are placed nearby the plant.
  • Controller receives data from Mobile app (e. g. optimal values for every measured attribute). Controller is connected to Mobile app through Wifi adapter or Bluetooth adapter.
  • When connected to Mobile app, user can check status of a plant in Mobile app in real time. Even if Mobile app is not connected, plant status is still reported by LED lights.
  • Controller is also controlling Watering system, which waters the plant if necessary.
  • Controller is also connected to other needful components, such as board and wires.

State diagram

System must be initialized before any further action. It includes connecting to the mobile app, loading libraries, etc.
When done, the system will start measuring data through sensors every 10 second. In parallel, user can open the mobile app and register a plant. System has access to a database of plants and their optimal values of several attributes (e. g. temperature, humidity). As the database doesn't contain every plant, user must enter the optimal values of missing plants manually.
When the plant if finally identified, system starts reporting status of the plant by checking whether or not is the measured data in the optimal range. If the measured data is in the optimal range, status of the plant is OK. In case the measured data is out of the optimal range, system will keep monitoring the plant. If the values are out of the optimal range repeatedly for at least 1 hour, status of the plant is NOT OK. This condition was added especially for cases when the measured data drops out of the optimal range and then back in, to prevent the user to be notified when it's not really needful.

Mobile application

Wireframes of a mobile application for plant monitoring system:

1st screen

List of registered plants.
Red exclamation mark indicated that the plant is NOT OK, meaning that not all measured attributes are in the optimal range.
Green check mark indicated that the plant is OK, meaning that all measured attributes are in the optimal range.
Click on a plant to show more information about its status.
Click on + to add a new plant.
Search the list by typing into search box.

2nd screen

More information about status of the plant Golden pothos.
The plant name is also highlighted by green color to indicate that status is OK.
Graphs displays values of the measured attributes over time. Optimal range is highlighted by green color. Values out of the optimal range are highlighted by red color.
Explanation for the 2nd graph: air humidity used to be out of the optimal range, but it's in the optimal range, so the status is OK now.

3rd screen

More information about status of the plant Aloe vera.
The plant name is also highlighted by red color to indicate that status is NOT OK.
Graphs displays values of the measured attributes over time. Optimal range is highlighted by green color. Values out of the optimal range are highlighted by red color.
Explanation for the 3rd graph: soil moisture is out of the optimal range, highlighted by red color. Optimal range is highlighted by green color and in this case, it's lower than the measured values, so the user will know that the plant was overwatered.

4th screen

Adding a new plant - philodendron.
After typing 'phil', the app suggests a list of philodendrons.

5th screen

Adding a new plant - oxalis triangularis.
After typing 'oxalis triangularis', no results were found, however the user can still add the plant.

6th screen

After adding a new plant - oxalis triangularis, user has to manually set optimal values of the measured attributes.

Used components

Arduino Uno R3

Price: 24.90€
Quantity: 1
Buy: https://www.alza.sk//arduino-uno-rev3-d569244.htm?kampan=adw1_komponenty_pla_all_komponenty_ostatne-komponenty_c_9062578__ARD204a&gclid=Cj0KCQiA3Y-ABhCnARIsAKYDH7uPNRlXq6IhEcGjWyWs1o-7eal8RbkoZVN0EGYHmZs7EOErCPAywjEaAofcEALw_wcB

LM393 soil moisture sensor

Price: 2.00€
Quantity: 1
Buy: https://techfun.sk/produkt/senzor-vlhkosti-pody/

DHT22 air temperature-humidity sensor

Price: 6.20€
Quantity: 1
Buy: https://techfun.sk/produkt/senzor-teploty-a-vlhkosti-dht22/

LCD display

Price: 3.30€
Quantity: 1
Buy: https://techfun.sk/produkt/display-lcd-16x2-tmavomodre-podsvietenie/

LED lights

Total price: 0.15€
Quantity: 3
Buy: https://techfun.sk/produkt/led-ka-1-kus-rozne-farby/

Other

Approx. 15€
Total price is approx. 51.55€
My price was higher (approx. 110€) , because I bought Arduino starter kit, which includes components suitable for more other projects.

Wiring scheme

Illustrations


LEDs Testing

In publication https://extension.uga.edu/publications/detail.html?number=B1318&title=Growing Indoor Plants with Success are shown recommended conditions for many kinds of plants.
We searched our monitored plant and found out, that recommended conditions are the following:
  • Temperature min: 18.3 C
  • Temperature max: 23.9 C
  • Humidity min: 5%
  • Humidity max: 25%
  • Soil moisture min: 10%
When the measured data are different from recommended for at least 1 hour, corrensponding LED starts shining:7
  • green: temperature
  • blue: humidity
  • red: soil moisture
Photo before evaluation (no LED is shining)
Photo during evaluation (blue and green LEDs are shining)

Future work


  • Návštevy: 1271

P07-2020-Automated Tea Infuser

Hodnotenie používateľov: 5 / 5

 Links

P07-Automated Tea Infuser Documentation

Automated Tea Infuser on Wikifactory

P07 - Automated Tea Infuser

p07 tea infuser final

As part of a semestral project, we decided to build an automated tea infuser.

The need for a such device stems from the diversity of the different types of tea and, of course, the individual preferences for tea infusing.

One of the possible use cases occurs in a situation where the user forgets to pull out the tea bag after a certain time. This is an unpleasant situation, where in most cases the user is disgusted and unnecessarily wasted, as the user does not like the brewed tea, or the tea is too strong, which is caused by the high degree of brewing.

The second use case is usability and convenience when using an automated infuser. A common scenario is a situation where the user is in time distress. It is necessary not only to pour hot water over the tea, but also to guard the time needed for brewing. This creates an unpleasant situation where the user, most often in the kitchen environment, is dependent on an approximate time tracking via an analogue clock, as the smartphone with a timer may be in another room. At the same time, keep in mind that the time constraint increases every minute. Time tracking thus increases the user's aversion to the activity and reduces the overall enjoyment of the beverage preparation.

Another use case may involve a situation where the user pours the tea but forgets about the tea.

It is also necessary to keep in mind the wide range of tea enthusiasts who need to know the water temperature and set the exact brewing time when preparing tea.

The proposed embedded system would be able to cover all these use cases, while allowing users to set the tea brewing time, after which the tea bag would be automatically removed from the cup. At the same time, after removing the bag, the embedded system would notify the user to end the tea brewing. In addition, during the process, the embedded system would show the cup temperature on the display.

Requirements specification

The requirements specification section summarizes the functional and non-functional requirements for the resulting embedded system.

Functional requirements

  • the embedded system should allow the user to set the timer value in 10-second increments,
  • the embedded system should allow both the increase and decrease of the timer value during the timer setting process,
  • the embedded system should load the cup temperature at regular intervals and display it on the LCD display,
  • the embedded system should update the timer value at regular intervals and display the number of minutes and seconds remaining on the LCD.
  • the embedded system should ensure that the tea bag is removed from the cup after the timer expires,
  • the embedded system should notify the user using an audible notification when the timer expires, and the tea bag is removed from the cup.

Non - functional requirements

  • the embedded system should be robust enough to withstand incorrect user input,
  • the embedded system should be safe enough so that the user does not suffer any damage to health or property as a result of its use,
  • the embedded system should be usable by the user, the individual actions should be sufficiently predictable and easy to use.

Components

The following components will be needed for the project implementation:

  • Microcomputer Arduino Uno Rev3

https://www.alza.sk/arduino-uno-rev3-d569244.htm

23,90€

  • LCD display 16x2 with yellow backlight and I2C module

https://techfun.sk/produkt/led-display-16x2-zlte-podsvietenie-spajkovany-i2c-modul/

4,90€

  • Keypad 4x1

https://techfun.sk/produkt/klavesnica-4x1-avr-4-klavesy/

0,90€

  • Non-soldering contact field (breadboard) 400 points

https://techfun.sk/produkt/nepajive-pole-400-bodov/

1,90€

  • Servo SG90

https://techfun.sk/produkt/servo-motorcek-sg90/

3,10€

  • Servo SG90 - 360° - continuous

https://www.hwkitchen.cz/9g-mikro-servo-motor-sg90-360-kontinualni/

4,71€

  • Active buzzer on board

https://techfun.sk/produkt/aktivny-buzzer-na-doske/

1,50€

  • LM35 temperature sensor

https://techfun.sk/produkt/teplotny-snimac-lm35-samostatne/

1,80€

The total amount for the components needed to implement a functional prototype is 42.7 € excluding shipping costs and a 9V AC-DC power adapter that we have available.

Besides components, the following material is required for implementation:

  • Jumper cables M-F
  • Jumper cables M-M
  • Insulation material
  • Tin solder
  • Resistor set

Also, for the implementation of the project, it is advisable to have a soldering iron or a soldering station.

Libraries

Wire.h

The library allows you to communicate with the I2C bus. In firmware, it is only used during I2C bus scanning.

LiquidCrystal_I2C.h

The library is used to control the LCD display connected via the I2C bus. The interface is similar to the standard LiquidCrystal library. Working with the library is simple and allows the use of displays of various sizes, the size of which must be set when initializing the library.

Keypad.h

The library allows you to work with the keyboard. As with the LCD library, a keyboard of various sizes can be used with the Keypad.h library.

Servo.h

To work with the servo drive, we decided to use the Servo.h library, which greatly simplifies the work. For proper operation, it is necessary to connect the drives to the PWM outputs of the microcomputer.


 Links

P07-Automated Tea Infuser Documentation

Automated Tea Infuser on Wikifactory

  • Návštevy: 1074

Ďalšie články…

  1. P11-2020 Smart brewery
  2. P12-2020 - EA tutorials for beginners using ActivePresenter
  3. P13-2020-Smart indoor glasshouse 
  4. P14-2020 - Baby monitor

Strana 1 z 2

  • 1
  • 2


© 2023 by JoomLead. All rights reserved.
  • Systémové myslenie v IT a Digitálna Fabrikácia
    • 2017-2018
    • 2018-2019
      • 2018-2019-Študenti
    • 2019/2020
      • Študenti
      • Projekty
        • 2019_P01
        • 2019_P02
        • 2019_P03
        • 2019_P04
        • 2019_P05
        • 2019_P06
        • 2019_P70
        • 2019_P08
        • 2019_P09
    • 2020/2021
      • 2020/2021-Studenti
      • 2020/2021-Projekty
    • 2021/2022
      • 2021-2022-Študenti
      • 2021-2022-Projekty
    • 2022/2023
      • 2022/2023-Studenti
      • 2022/2023-Projekty
    • 2023/2024 2023/2024
  • Prednášky
  • Systémové myslenie pri tvorbe IoT riešení
  • Kurzy
  • Workshopy
  • Kybernetické riešenia - Kybernetickým spôsobom
    • Finančná gramotnosť v inteligentných riešeniach-úvod